Have you always dreamed of starting your own travel blog?
Finally, you can get your travel blog up and running today! Here is my detailed
In this post, I’m going to walk you through step-by-step how to create and design a website using WordPress.org. I will walk you through all the technical and design and details to start your travel blog in the cheapest possible way just from this one post!
I also cover SEO and how you can use Social Media to drive traffic to your new blog.
This is a long post so I’ve included a table of contents below so you can easily navigate to the correct section of the post if you need to come back.
- Choose The Perfect Name For Your Blog
- Set Up Web Hosting And Get A Web Domain
- Install WordPress Blogging Software
- WordPress Housekeeping Tips Before You Start Your Travel Blog
- Install A Beautiful Free WordPress Theme
- Set Up Essential Plug-ins And Create A Child Theme
- How To Design Your Blog
- Customize Your Blog’s Look Using CSS
- How To Install Opt-In Forms And Build An Email List
- Start Creating Travel Content That Is SEO Optimized
- Get Social With Pinterest And Instagram!
Are you ready to dive in and start the travel blog of your dreams? Let’s go!
1. Choose The Perfect Name For Your Blog
This is most definitely the hardest of all the steps on the list when you start a travel blog. Picking a name for anything is tricky, especially when you are as indecisive as me!
Brainstorm
When choosing a name it is best to brainstorm a bunch of words and combinations of words that go well together and a relevant to travelling. I love looking for synonyms and words that start with one letter to find nice combinations of words.
Be Original
Keep in mind that you want your name to be unique and reflect the vibe of the travel blog you want to create. Also, make sure it is relevant to what you are writing about so people know what your blog is when they see the name.
Get Searching For Web Domains First
Another factor that will determine what you call your new travel blog is the availability of the domain before you start! This will no doubt require you to come up with something cool, creative and catchy.
Think Long Term
When starting a travel blog come up with a name think long term! You may just see your new travel blog as a small hobby now but you don’t know where it will go, so pick a name that doesn’t pigeon hole you too much into a small niche.
Keep Your Ideal Reader In Mind
Make sure you have your ideal audience in mind and the kind of stories you want to tell so that you attract the right people to your travel blog.
If you are a solo female traveller who wants to travel extensively in the Greek Islands you could choose to start a travel blog that focuses on solo female travellers as opposed to solely Greek tourism.
You could call your travel blog ‘Solo Sally’ instead of ‘Greece Uncovered’. This gives your blog more scope for growth while still finding a niche group of readers.
2. Set Up Web Hosting And Get A Web Domain
This is the only step you will have to pay a small amount of money to start your travel blog!
Why Web Hosting?
Web hosting is essentially like paying rent for your space on the internet. It is required when you use wordpress.org for your travel blog. You could set up a website for free through wordpress.com or blogger.com however you get very limited flexibility and customization. It’s hard to grow your blog and monetize it in the future as well.
Another option is to pay a monthly fee for a service like Square Space, however, this is much more expensive in the long run and less customisable (but is the easiest option!).
It’s difficult to migrate your site to wordpress.org in the future so I recommend setting yourself up now for your future self. There is a reasonably steep learning curve with WordPress when you have just started a travel blog but it’s such a worthwhile skill to learn even if your new travel blog is just a fun hobby for now!
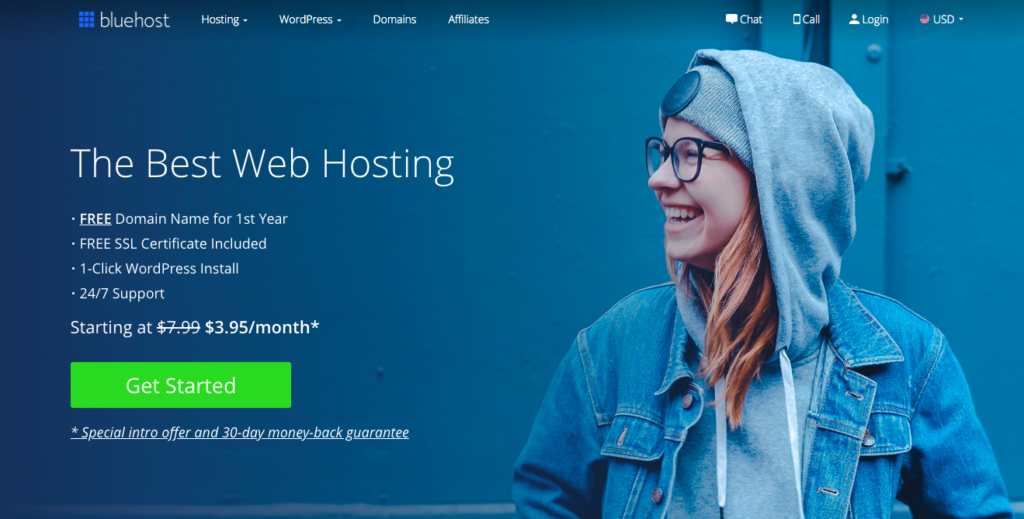
Web Hosting With Bluehost
Web hosting is quick and easy to set up and inexpensive. There are a few different providers out there for web hosting. The one I recommend and personally use myself is Bluehost. Bluehost is optimized for WordPress and they also have excellent customer support which is essential when you first start your travel blog.
Their most basic plan starts at $3.95 per month and you also get a free domain for your first year when you sign up! Since you are just starting out I’d recommend going for the basic plan, you can always upgrade your plan later as your blog grows.
How To Sign Up With Bluehost
First
To get started head over to the Bluehost homepage
Once you’re there click Get Started
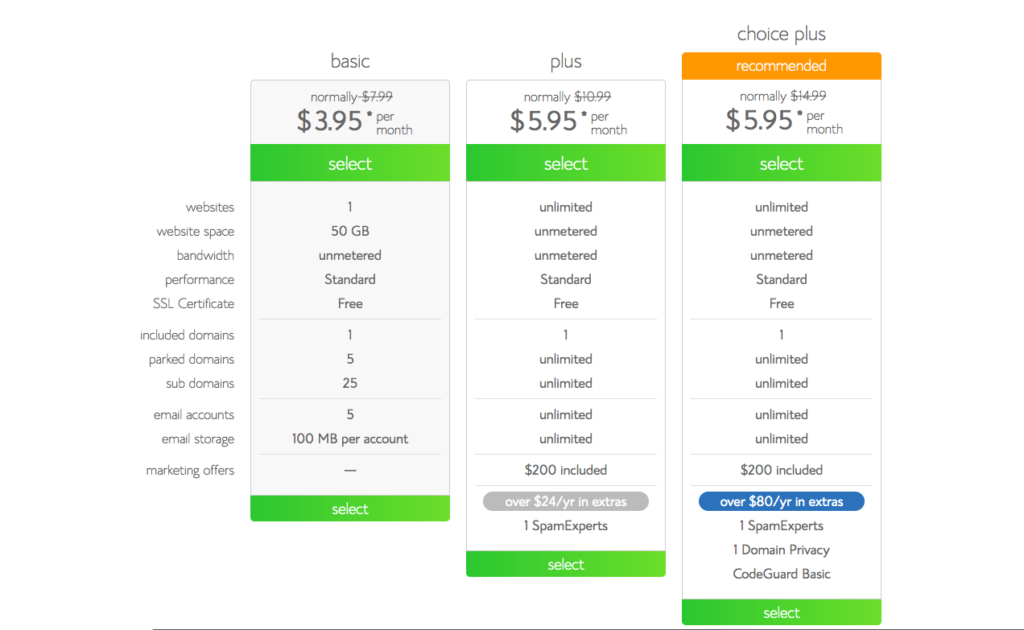
Second
Next, choose your plan, again I’d recommend going for the $3.95 per month plan. This price is based on 36 months of hosting. You can choose plans that are shorter however they are more expensive per month. It’s nice to buy it once and then you know you don’t have to worry about it for AGES.
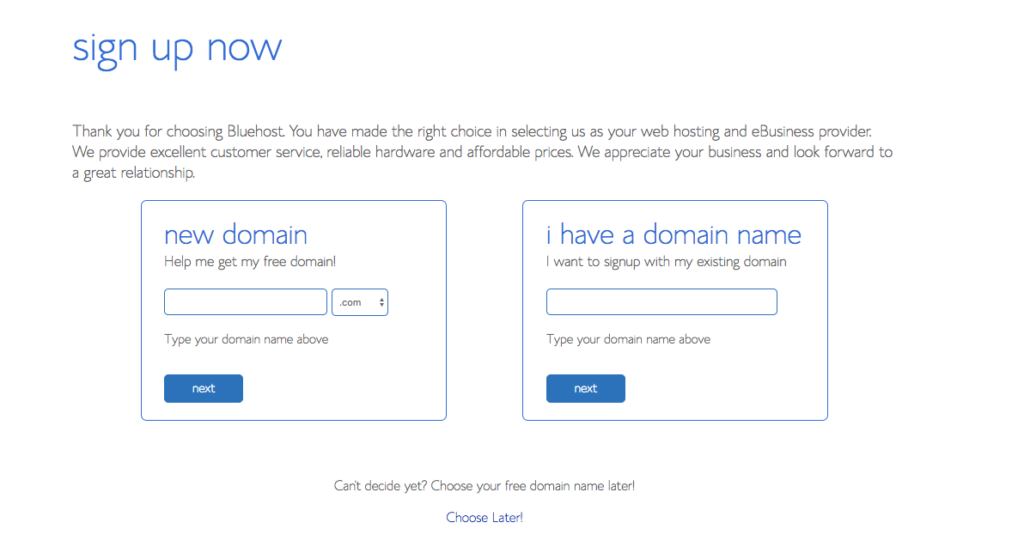
Third
Add your free domain! You can search availability of your blog name here (if you haven’t already). If you already have a domain you can also add it here. If you don’t know what you want your domain to be yet you can skip this step and do it later.
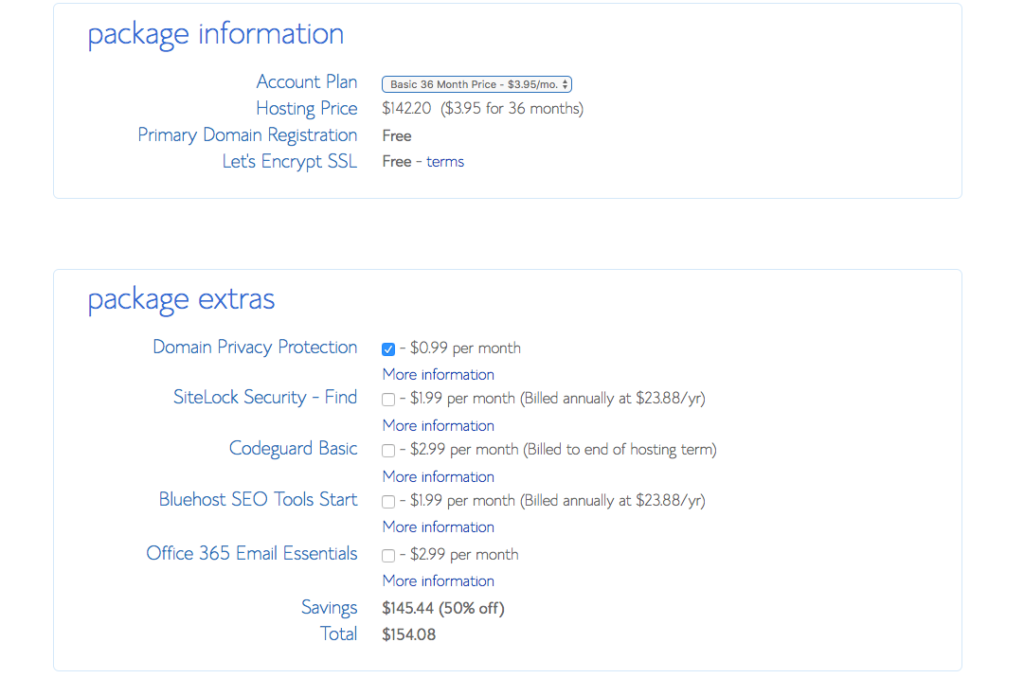
Fourth
Now all you need to do is fill in all your personal details and account information. This is also where you can select to have any add ons. The only one I recommended is the domain privacy protection which protects your personal information from being available.
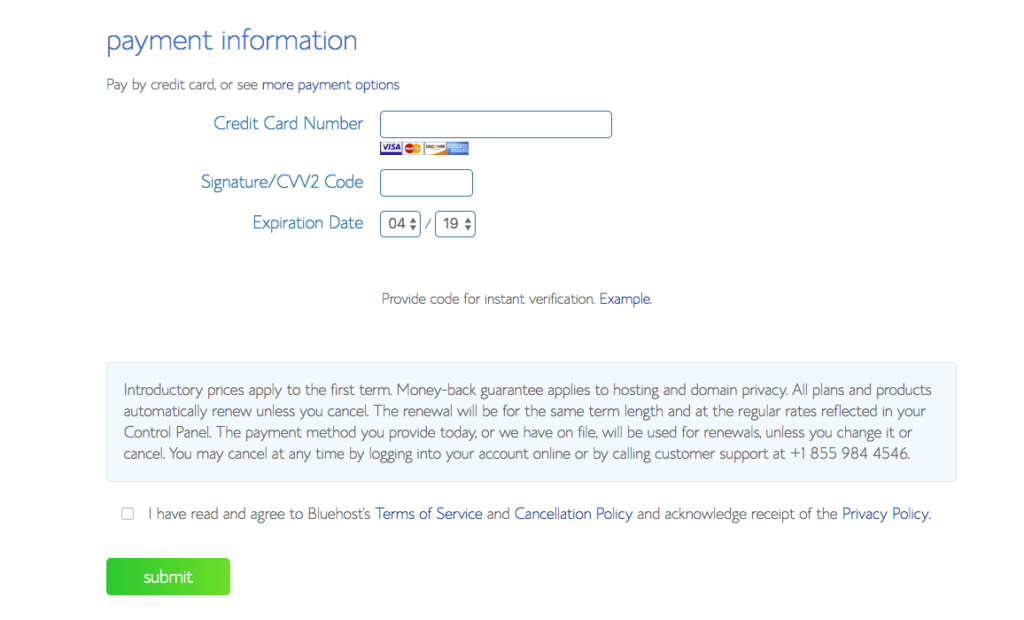
Fifth
Finally, enter your payment information. Once your payment has been processed you will be able to create a password.
Congratulations, you’re done! You now have web hosting and your corner on the web to start your travel blog!!
3. Install WordPress Blogging Software
Thanks to Bluehost this step is so easy!
You want to have a self-hosted WordPress account, where the software is on the host site as opposed to WordPress’s free site so you have full control over your website, be able to advertise and have access to Google Analytics.
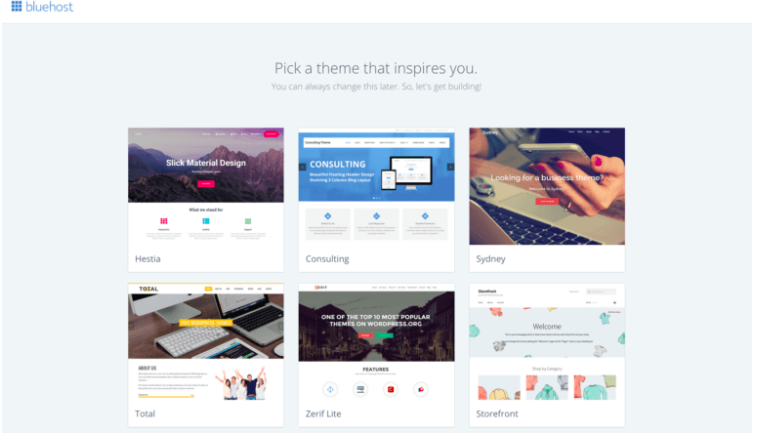
First
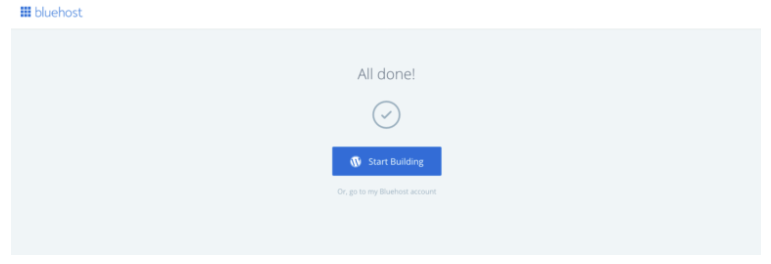
Once you have signed up for Bluehost WordPress is already installed! Bluehost will ask you to pick a theme. Pick any as you will be changing this later!
After this is done you will see a screen that will allow you to ‘start building!’
Second
Next, you will be asked whether your site is for business or personal. Go on pick business! You never know where starting this travel blog will go.
Third
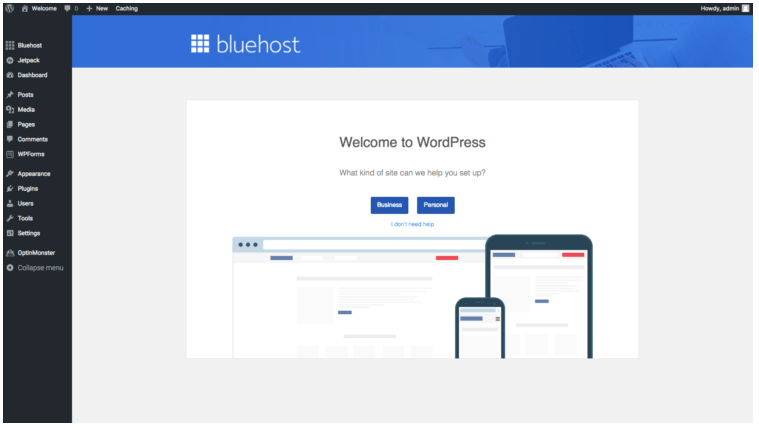
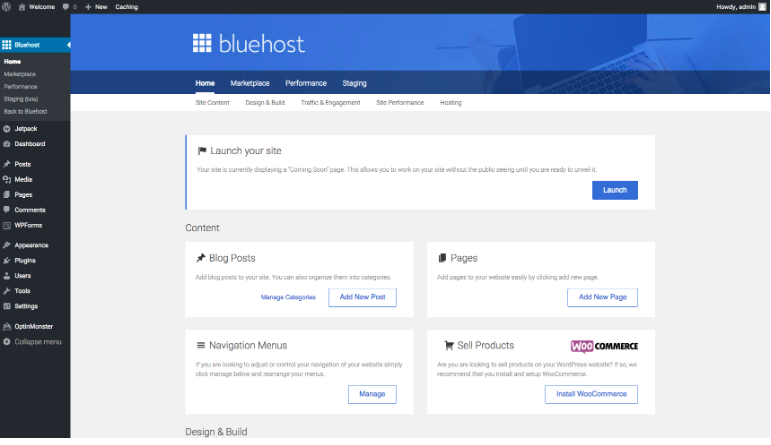
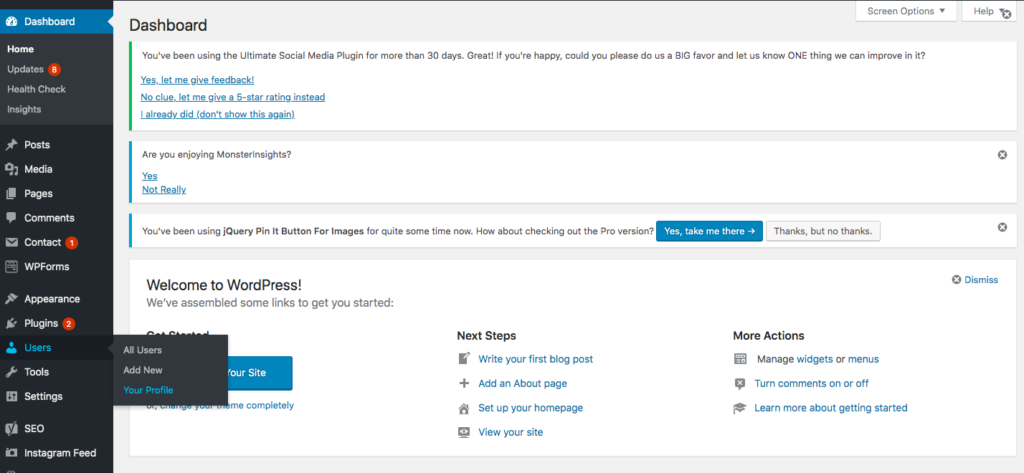
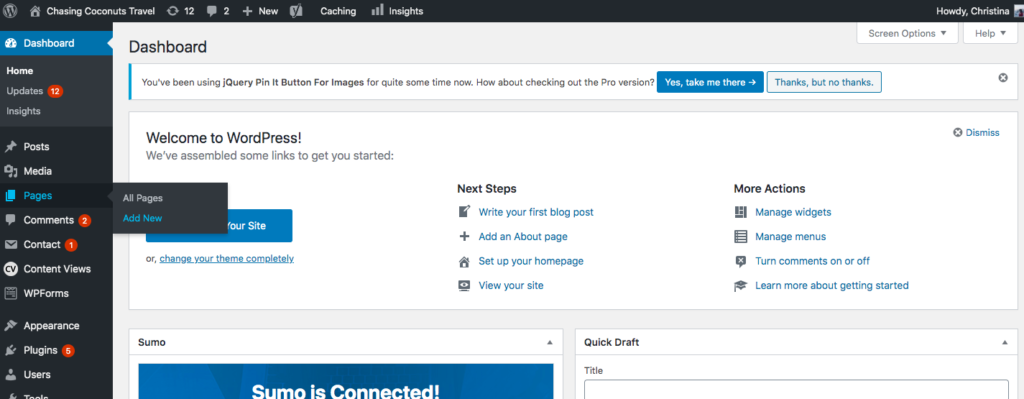
Now you will be taken to the dashboard of your WordPress site. Down the left-hand side, there are a bunch of options.
Here is where you can build your site by creating static pages, new posts, manage comments on your blog, change the appearance which includes your theme, menus, categories and so on. This is also where you can install plugins to add additional features to your site.
Fourth
Click on Launch your site and fill in your site’s title and slogan. Don’t stress about this you can change it anytime.
Fifth
Click next step and you will be asked if you will be uploading blog posts so go ahead and click yes. Then it will ask you if you want a static welcome page or a homepage with updates, this is up to you!
Next, it will ask for your business address, click not now if you don’t have a business address as you don’t want your personal address online!
Next, it will ask if you want to install WooCommerce to sell products online, you can hit ‘not now’ again for this step.
Sixth
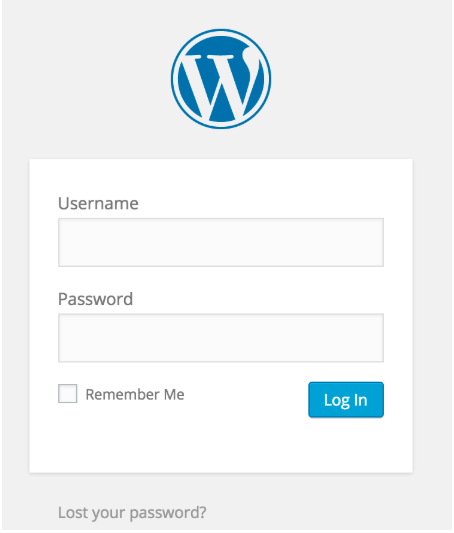
To log in to your site you can either log in through the Bluehost homepage or go to http://yourdomainname.com/wp-admin and you will see the log-in page below. Type in your log-in details and you’re in.
And you’re done! Now it’s time to start building your site! Yay!
4. WordPress housekeeping tips before you start your travel blog
Here are a few things you should adjust in WordPress before you get going to get your travel blog off to the best start.
These tips are not totally necessary but will set up a really good foundation for your blog!
Change Permalinks To Post Name
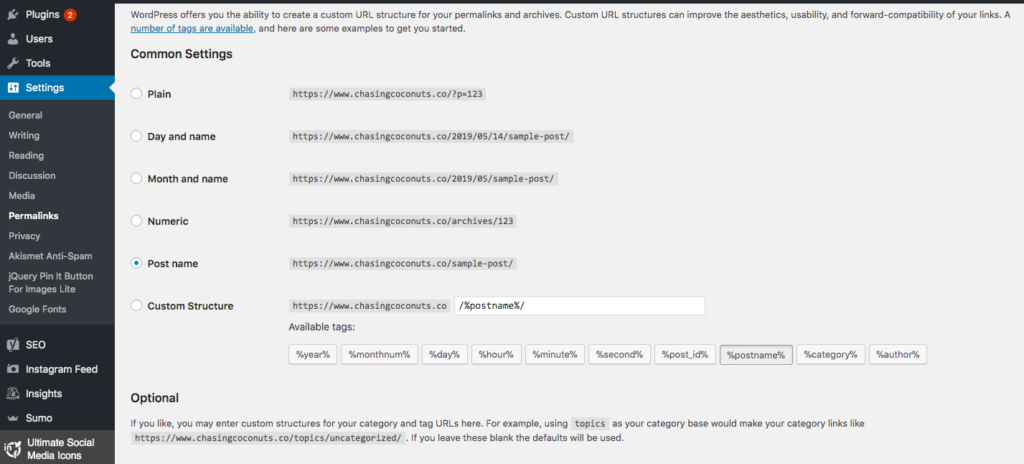
Permalinks are the URLs that are entered to reach pages and posts on your site. By default, WordPress uses permalinks with lots of question marks and numbers which doesn’t look great and is bad for SEO
Doing this step will make your URL more attractive and SEO friendly. By changing the permalink structure to ‘Post Name’ your URL will end with the name of your post with dashes between each word. Like this: https://www.chasingcoconuts.co/guide-to-istanbul-in-5-days/
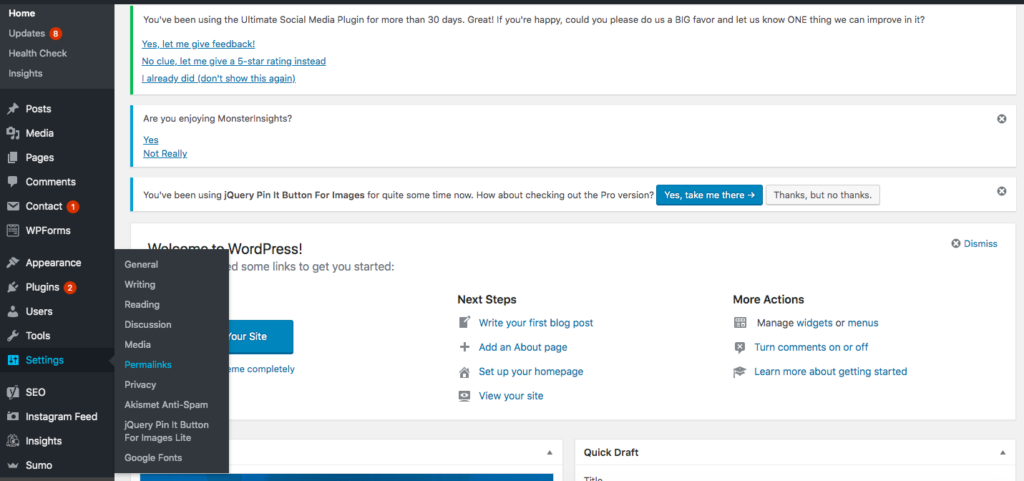
To do this hover over settings on the lefthand sidebar and click on the permalink option
Under common settings select the ‘Post Name’ option.
Change your Display Name
The display name is the name that is displayed as the author on your blog when you publish content.
WordPress, by default, will set your display name as admin however it is much better to have your real name as your display name! So here is what you need to do.
Hover your mouse over Users and click on your profile.
Next scroll down to the Name section. First change the nickname to what you want to use as your display name. This could be your first name.
Then underneath the nickname section where it says display name publicly as. From the drop-down select your nickname.
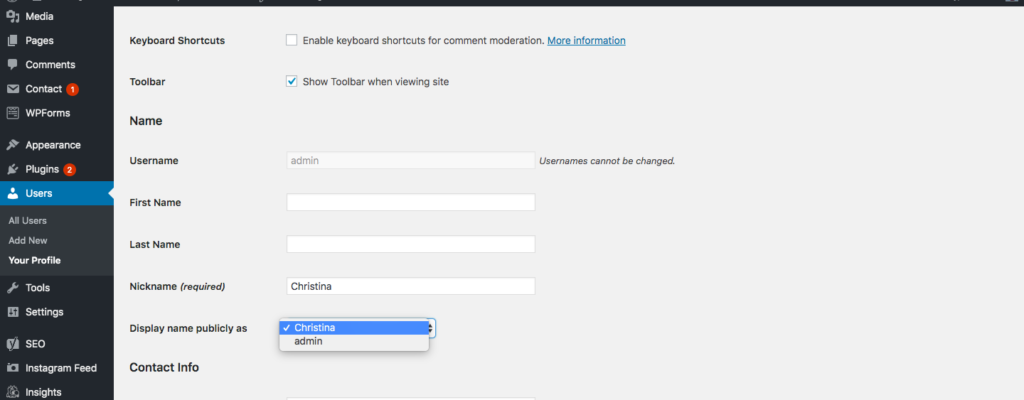
After this is done scroll to the bottom and click update profile.
Remove Unnecessary Plug-ins
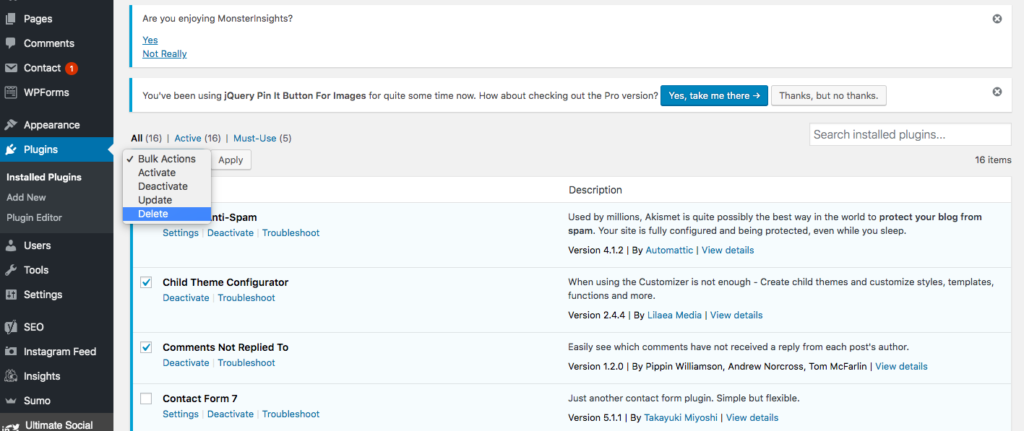
By default, WordPress will install a number of plugins that aren’t necessary. These plugins can be useful but for a travel blog, you don’t need them. Here is how you can delete them and which ones I chose to delete!
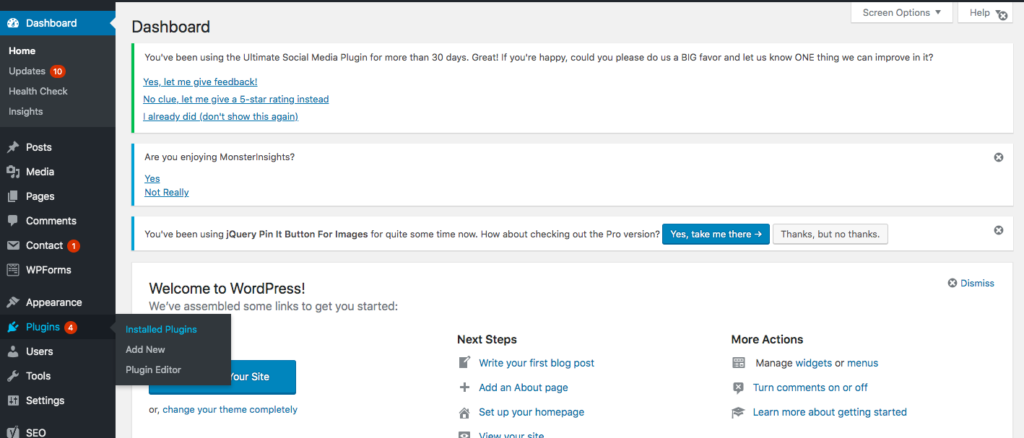
On the left sidebar hover over the plugin and select installed plugins
Select the plugins that you do not want to use and click on deactivate under each one. I deleted the following plugins:
- Hello Dolly
- Jetpack by WordPress.com
- MOJO Marketplace
- OptinMonster API
Update Site Title
Here is how to personalise your site title and your sites ‘tagline’.
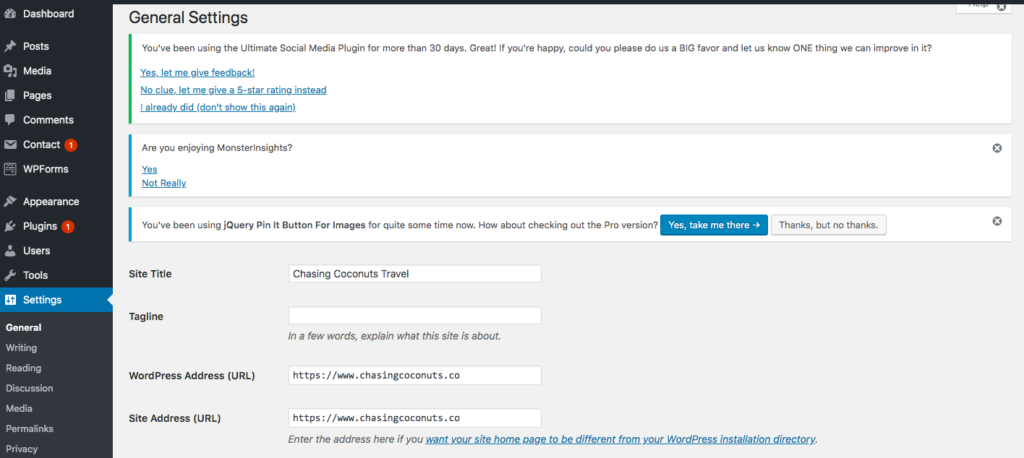
First, go to hover over settings and go to general.
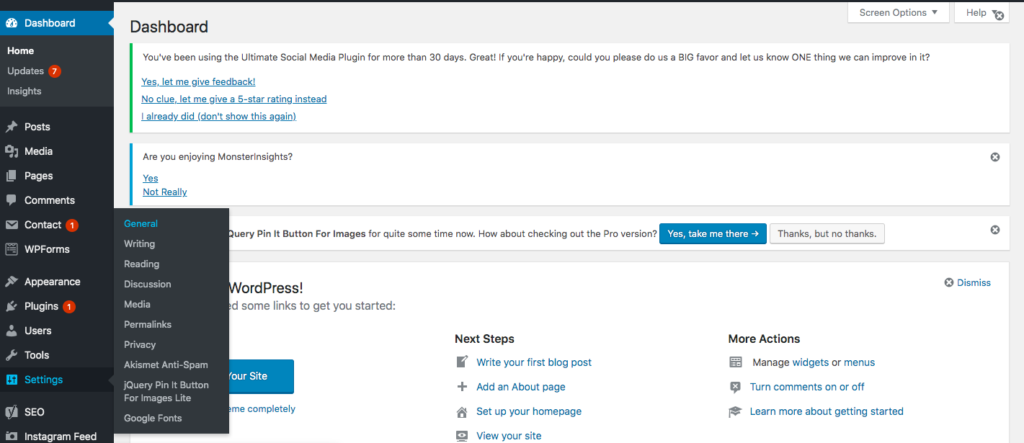
Here you can update your site title and your tagline which is a general description of what your travel blog is about.
Delete Sample Page And Post
Your blog will come with a sample page and post, titled ‘Hello World’ and and ‘Sample Page’ respectively, which you will want to get rid of before you start your travel blog.
Access your posts by hovering over posts on the left sidebar and clicking on all posts. Here you will see the sample post ‘Hello World’. Select the post and move to trash.
Access your pages by again hovering over pages on the left sidebar and click on all pages. Select the box next to ‘Sample Page’ and move to trash.
Awesome! Now your WordPress Admin area is all cleaned up we are ready to install a theme.
5. Install A Beautiful Free WordPress Theme
How To Choose A Theme
Choosing the right theme can seem a bit daunting when you start a travel blog. You need to consider whether you want to pay or to just settle for a free theme at this stage. You want to make sure it is responsive, has good reviews, good support, is user-friendly, mobile-friendly and has easy navigation.
If you go for a paid theme like the very popular Divi by Elegant themes you will have a kickass site. However, you may not have the budget or the scope to pay for a theme when you first start a travel blog. There are plenty of amazing free themes that you can start out with.
You can also do some research on your favourite bloggers’ sites that you like the look of to see what theme they are using if you want to have a similar design. You can do this by putting the URL of their site into WordPress Theme Detector. Note that this will only work if their site is built on WordPress!
How To Install A Theme
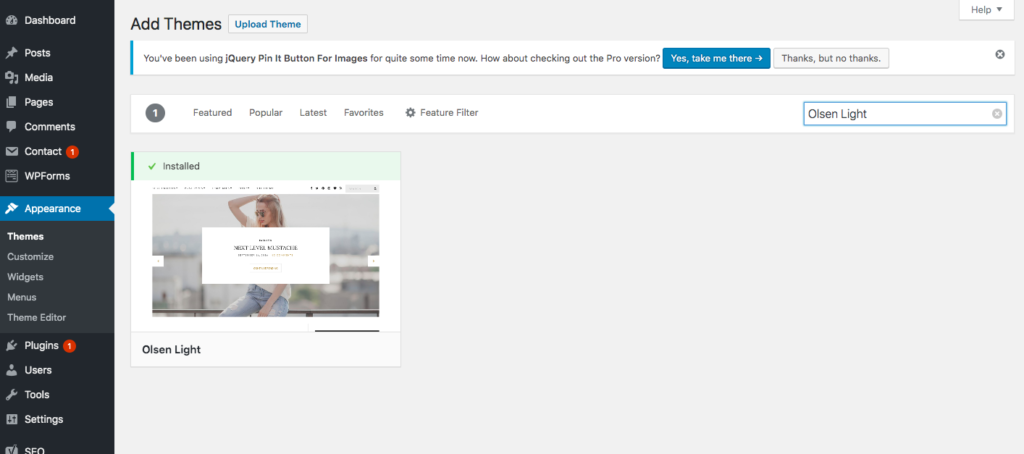
In this post, I’m going to recommend a free theme that I use on this travel blog called Olsen Light. Here is how to install your theme!
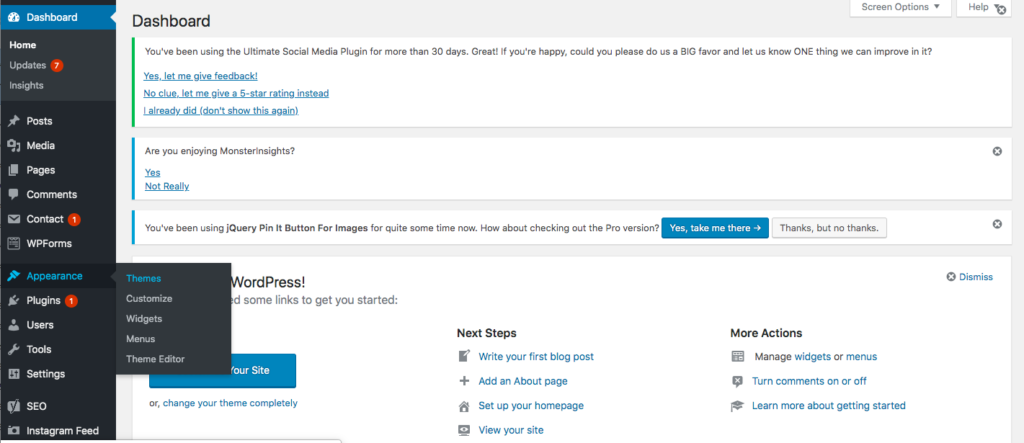
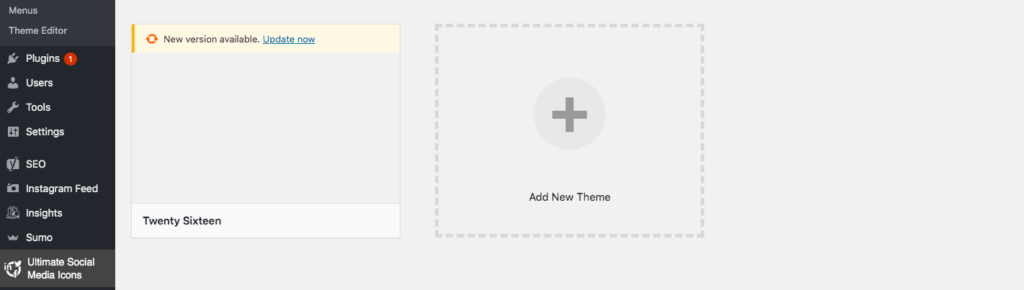
Hover your mouse over Appearance and click on Themes.
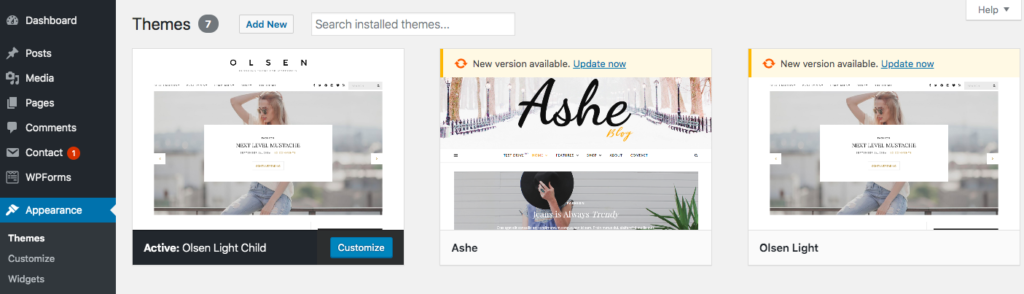
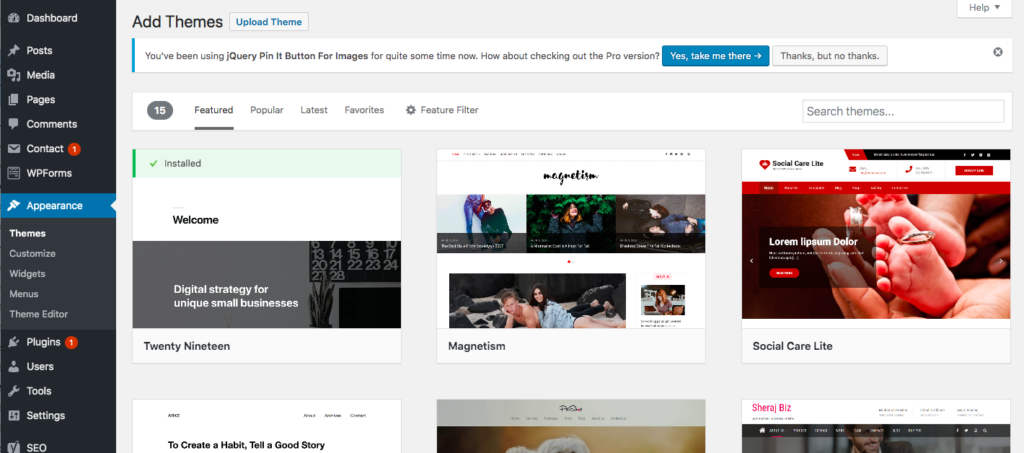
This will bring you to your theme management menu where you can add new themes, change themes and search for additional themes. To add your new theme click on the Add new theme + icon in the last box.
This will bring you to the WordPress Theme Directory where you can browse through the themes that WordPress has to offer. Filter your search for themes by different features and requirements. You can also use the search function to find a specific theme which is what we will be doing!
In the upper right-hand corner where the search bar is type in Olsen Light. Before you install any theme make sure you preview it to make sure it functions how you want your site to work.
If you hover your mouse over the Theme image it will come up with a ‘details & preview’ button. Here you will be able to see a basic demo of the theme and see the theme’s user rating.
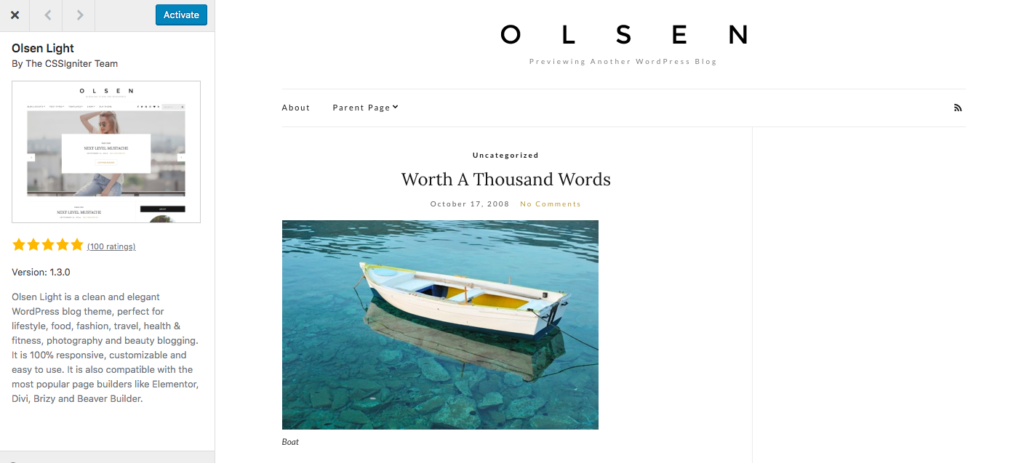
To install simply click on the install button on the top of the screen. Which will then turn into an activate button. Click the activate button. This will make the theme active on your blog.
You can preview your site at any time by hovering over the house icon and site name on the top left corner and click on Visit Site.
6. Set Up Essential Plug-ins And Create A Child Theme
Install These Recommended Plugins
WordPress plugins are pieces of software that can be added to your blog to extend the features and functionality of your site. Here are some that I recommend starting a travel blog with.
- Easy Forms For Mailchimp
- This will help you to build your email list
- Akismet Anti-Spam
- This plugin will protect your blog from spam
- jQuery Pin
- This allows you to have Pinterest buttons on all of your pictures you publish so people can easily share and save your content to their Pinterest
- Google Analytics for WordPress by MonsterInsights
- This plugin links up with Google Analytics to give you stats on your site’s traffic. Make sure you sign up for a Google Analytics account and link it to this plugin on WordPress.
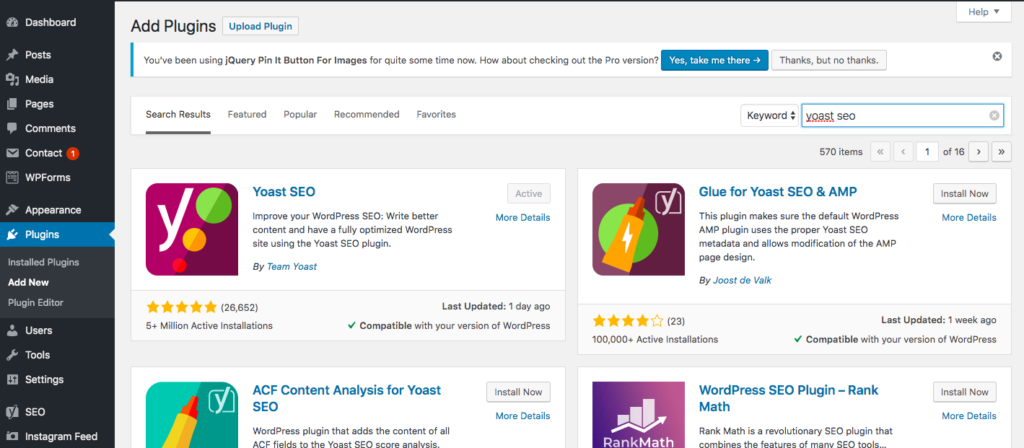
- Yoast SEO
- This is an amazing plugin which will help you to optimise your posts for search engines
- Simple Social Icons
- Allows you to display buttons to all your social media pages on your site like Instagram, Facebook & Pinterest
- WD Instagram Feed
- This plugin will display your latest Instagram pictures on your sidebar
- Child Theme Configurator
- This will allow you to build a child theme
How To Install Plugins
To install the plugins hover your mouse over Plugins on the left sidebar and click add new which will take you to the Plugin page where you can search for, install and activate your plugins.
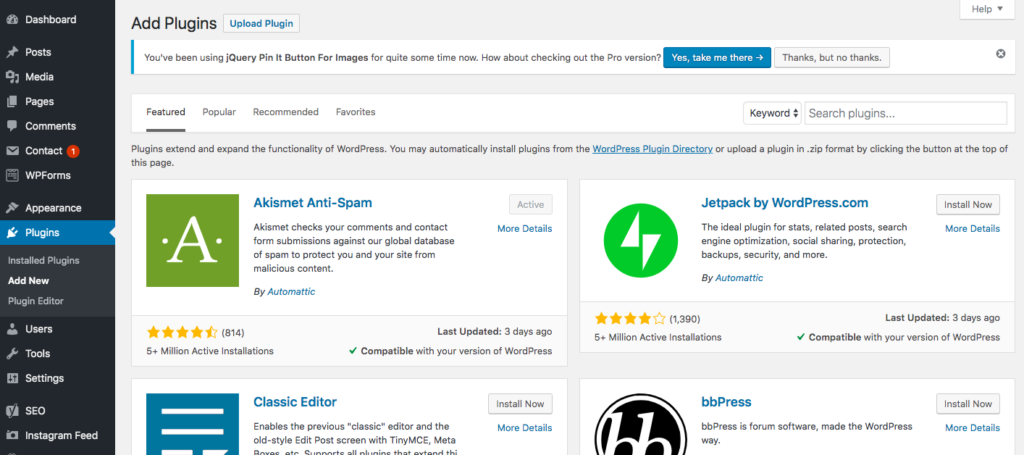
Type in the name of the plugin you want to install in the top right corner search bar. Click install now on the plugin you want to install. Once its installed click the activate plugin. You will now be able to see the plugin in your plugin management menu.
Configure The Plugins
Akismet Anti Spam
This prevents spammers from commenting on your blog so is very important!
Go to the Plugins menu and make sure the plugin is activated. To link this plug into your site you will need to get an API key.
Go to Akismet settings page link to go to Akismet accounting settings. Click ‘get your API key’ button where you will be taken to the Akismet homepage where you need to click on the on ‘Get an Akismet API Key’ button.
This will bring you to a page where it will take you to a pricing table for premium versions of the plugin, but it’s okay there is a free version! Just make sure you get the basic version. Next login with your WordPress account. This will give you the option to donate the creators which is totally up to you.
Click continue and then on the account overview page click on ‘activate this site’ which will update your API key and link the plug into your site. Back on the WordPress settings page save changes and it’s ready to go.
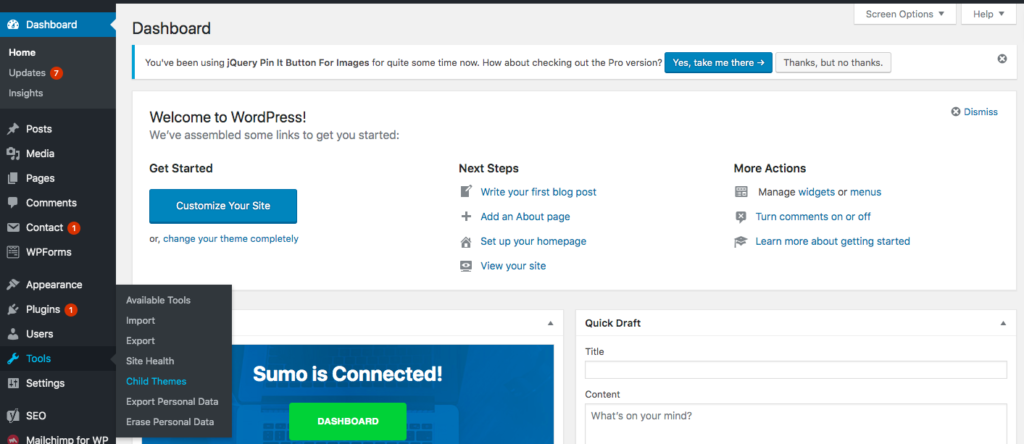
Child Theme Configurator
The child theme inherits the functionality of the main parent theme but allows you to make customisations to certain parts of the theme which will not get lost when the parent theme is updated.
This gives you the freedom to modify your site without worrying about the changes being lost when there are updates to the parent theme by the developers. Essentially allowing you to overwrite the parent theme. With a child theme, your changes will be saved but you will still have all the functionality of the parent theme.
Go to Tools and click on Child Themes which will bring you to the settings page. Select ‘Create a new child theme’, then select parent theme you are using which is Olsen Light. Then click Analyze.
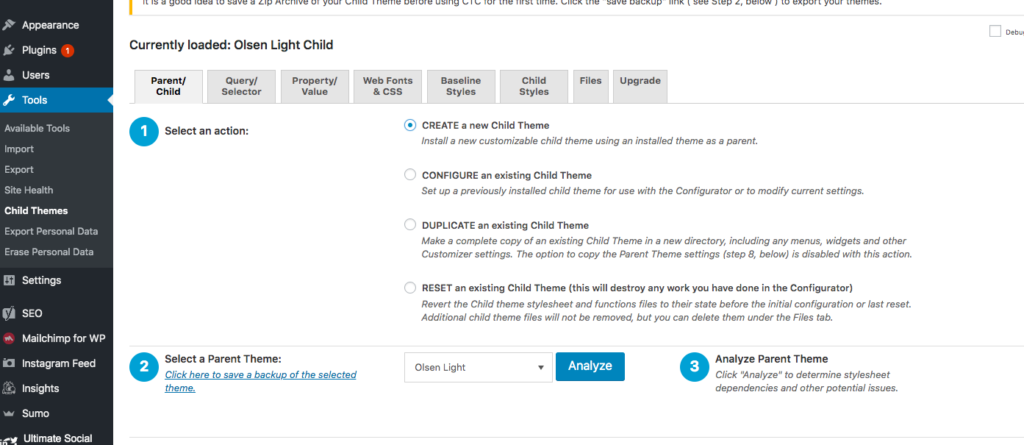
After the Analysis is done a bunch of other steps will populate. Go to step 8 and check the box to make sure all menus and widgets etc are copied. Next click create child theme button at the bottom.
At the top of the screen click preview, child theme link to make sure everything looks okay. Then click the save and activate blue button at the top of the screen
Add files to Child Theme from Parent Theme to customise
We are going to be customising some CSS files later on so we need to copy these files over from the Parent Theme to the Child Theme.
Click on the File tab at the top of the screen and under the parent template section check the box next to single.php section which is the single posts section of the theme. Select Copy Selected to Child Theme.
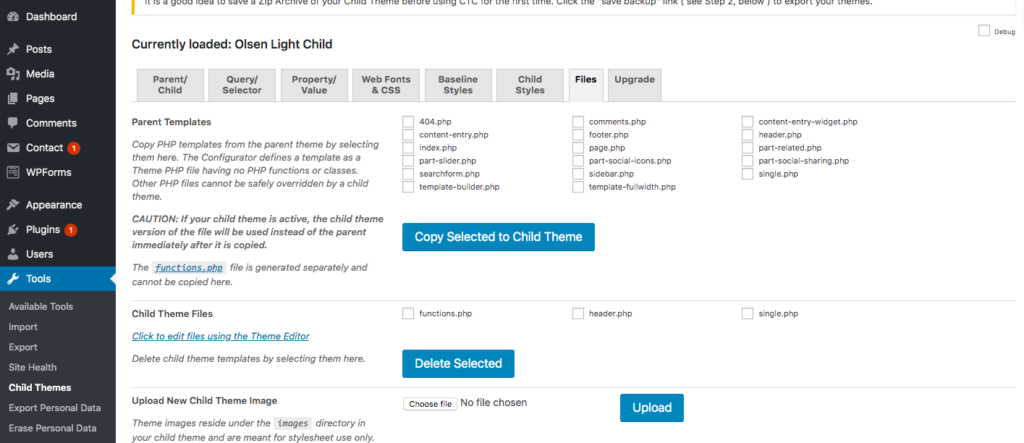
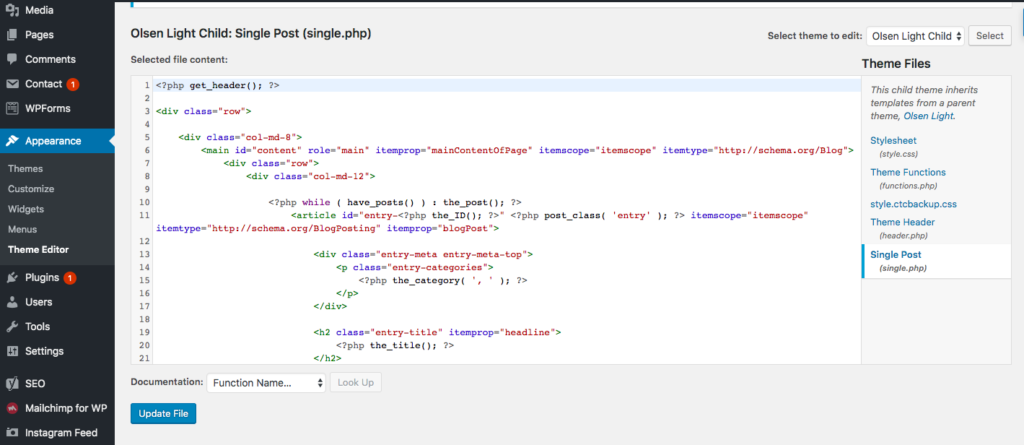
Any changes made to this file will be permanent. You can do this for any files which you want to modify in the theme. To check the files have been added correctly, hover your mouse over Appearance and click on Theme editor where you will see the code of the correct files have been added to the child theme.
JQuery Pin it Button
Click on settings under the name of the plugin and adjust the visual features to suit how you’d like the button to look, to a circle etc
You can just leave everything as is as it looks fine.
Simple Social Icons
To add your social icons to your blog go to Appearance> Widgets
You should see that an available Widget is Simple Social Icons. Select the down arrow and click Blog to add it to your main blog sidebar. You can also choose to add it to your footer as well.
Now you can go into the widget and adjust the colour of the buttons and add the links to your various social media sites. That’s it!
You can also edit this in the Appearance>Customise page and select widgets.
In the Customize view, you are also able to add buttons to your social networks on the head and footer bar by selecting social networks and adding the links to your social media sites there.
WD Instagram Feed
It is simple to configure this plugin. Click on the Instagram Feed button on your left sidebar in the dashboard and connect your Instagram account.
In the customize tab you can adjust the columns, the number of images as well as buttons. You can then go to Widgets and add the widget to your main sidebar or footer sidebar.
Yoast SEO
Go to the plugin and click settings. Under the notifications go to configuration and navigate to the configuration wizard site. Follow the steps to configure the settings to suit your blog, it’s all self-explanatory! You can choose all the free options even though they have a paid option.
Don’t worry too much about this as you can always go back and change it later once your site is live.
7. How To Design Your Travel Blog And Brand
This is one juicy section that will bring the travel blog you just started life.
Create Your Blog Logo
When you start a travel blog you can easily create all your own branding and graphic designs for FREE with Canva. Canva is a web-based platform where you can create every kind of online asset you could think of. It is a true game-changer in the online world for amateur content creators like you and me!
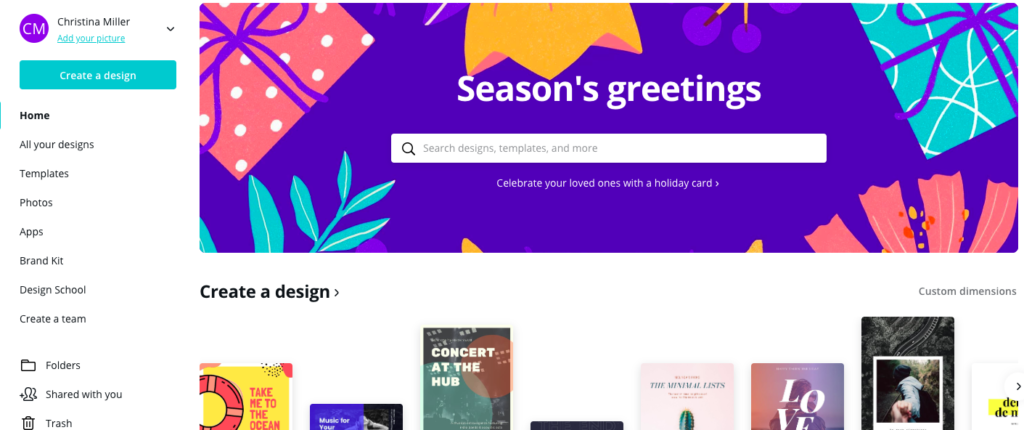
Every type of design comes with so many templates for you to use and customise to really get some inspiration if you’re clueless. If you know exactly what you want then you can also start from scratch!
You have access to different elements like photos, drawings & shapes as well as extensive fonts and colours which you can add to your branding palette.
I highly suggest creating an account on Canva and playing around with it and seeing what you can come up with. It’s so much fun and nothing is more exciting than seeing your vision come to life! Check out this cool logo making tool:
Canva Logo Maker Tool
There is also a paid version called Canva Pro which you pay $12.95 per month or $9.95 per month billed annually. I have started using this recently because it just opens up so many more options for stock images, fonts and other design elements not available on the free version. It’s absolutely incredible for someone with zero graphic design experience.
It also allows you to download images with a transparent background which is handy when you are creating logos for your site. They do offer a 30-day free trial for you to try it out so you might as well use that free trial to create a bunch of your assets!
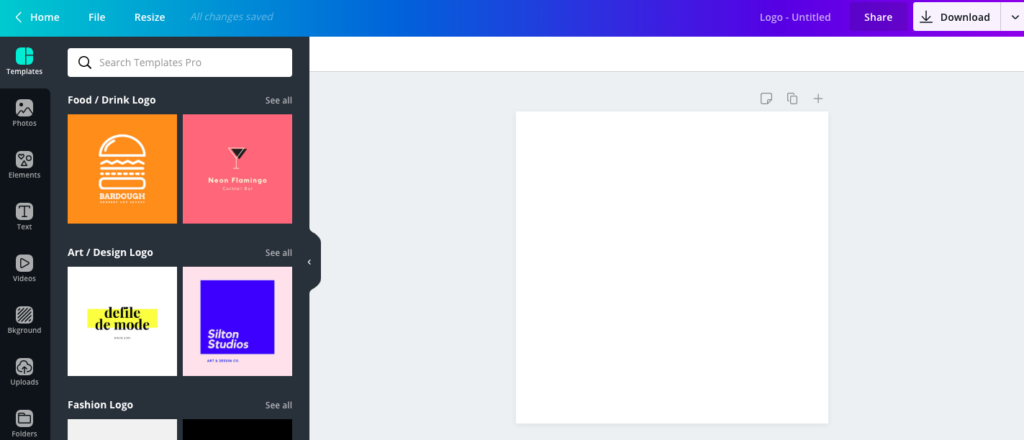
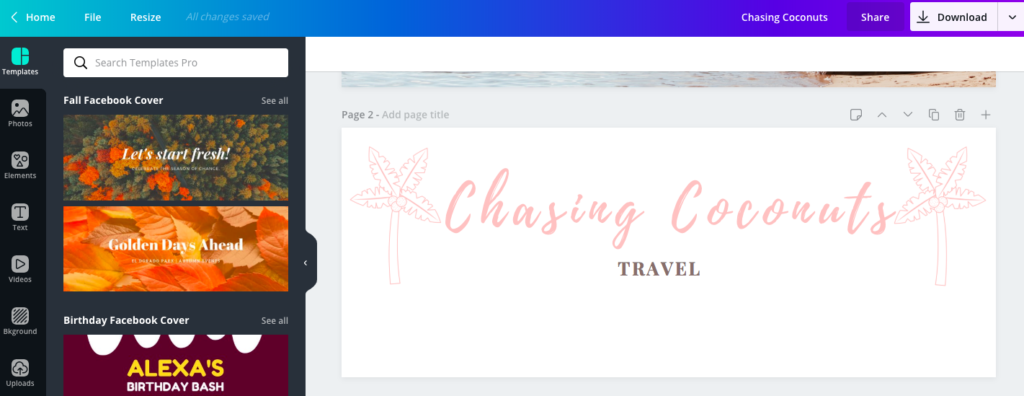
You can use Canva to create your logo that will appear on the top of your website like a banner with dimensions similar to that of a Facebook Cover Photo Like my logo here:
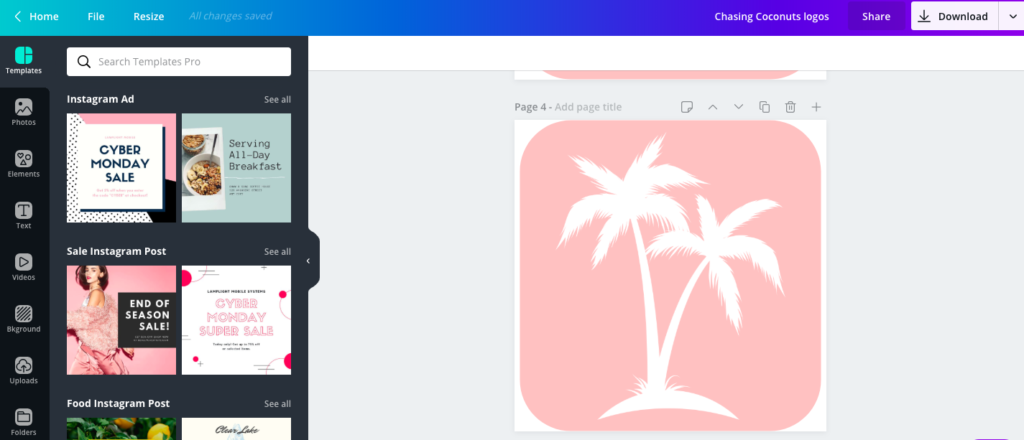
You can also create a little image or logo to use as your site icon which is the little icon on the left side of a tab. I used the Pro version of Canva for the site icon so that I could download the image with a transparent background so that the edges could be rounded and not have the white bits showing.
Add Your Logo To Your Blog
The theme that we are using allows you to put your logo at the top and the bottom of your page. You can either put the logo on the top and the bottom or just the top and some other image or design on the bottom. Otherwise, you can leave it blank.
To do this hover go to your main dashboard and hover over Appearance on the left sidebar and click on Customize.

This Menu is where you can make any changes and tweaks to your theme.
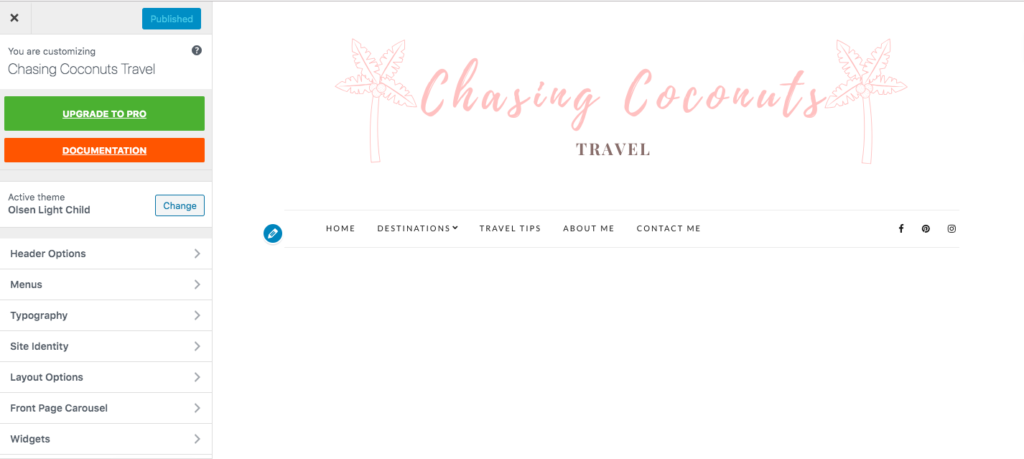
Click on Site Identity. Once you are there you can edit your site title and tagline. When you add a logo to the header the site title text will be overwritten but your tagline with remain.
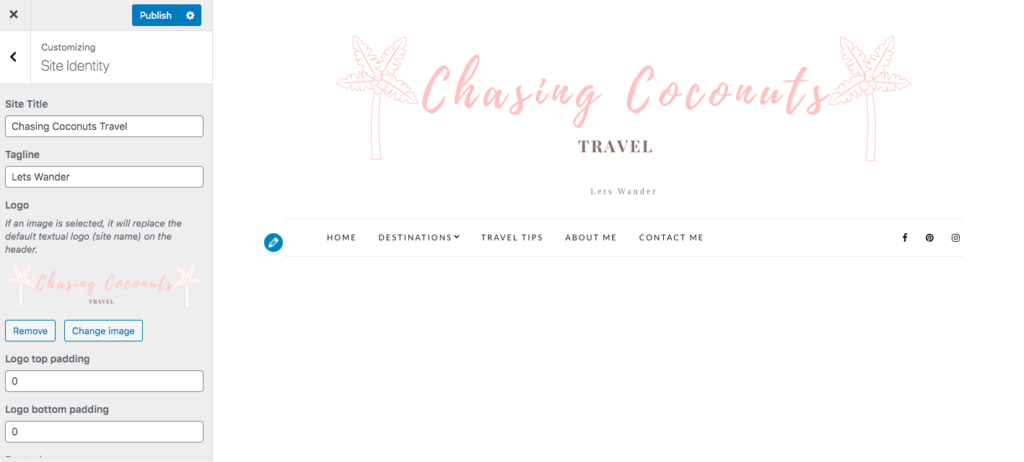
Upload the logo you downloaded from Canva on the header. You can crop the picture within WordPress to ensure it is the correct dimensions. As you upload the logo you will be able to see a preview of what your site will look like.
Keep scrolling down and add your logo again to the footer if you’d like or add another image as I have. You are also free to leave it blank!
Next, add your site icon image which you can again upload from you downloaded Canva image and crop to fit in the square.
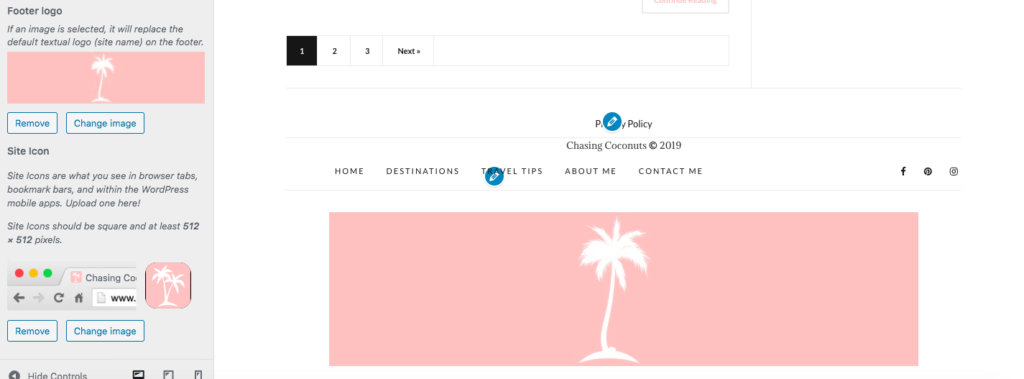
You will notice that the Olsen theme displays their credits on the footer which for branding purposes you may want to remove. Click the back arrow button to the main Customize Menu and click on footer options. Untick the box that says show credits text.
Once you are happy with how everything is looking hit publish!
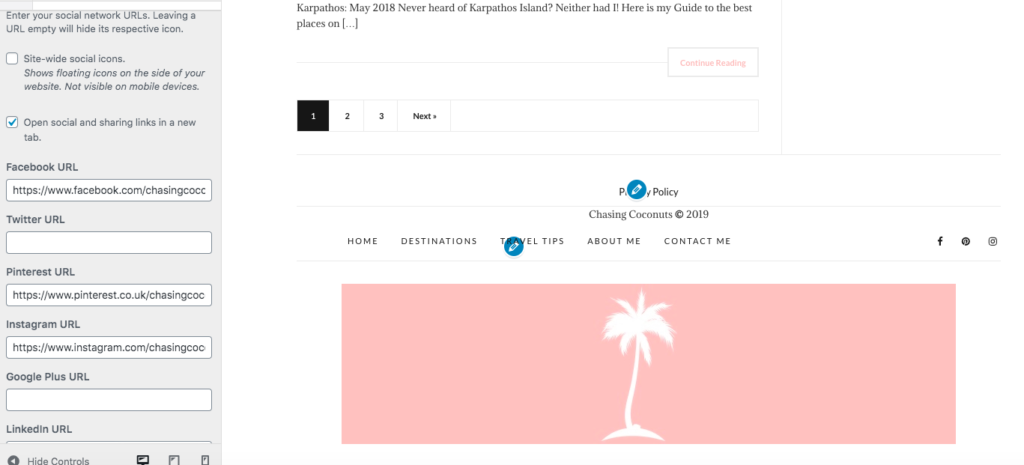
Configure your Social Networks
Staying in the Customization menu click on Social Networks. Here add links to all the social profiles that you have set up. I suggest having Instagram, Facebook & Pinterest as a minimum. Tick the box to have links open in a new tab so users to navigate away from your website when they go to your social profiles.
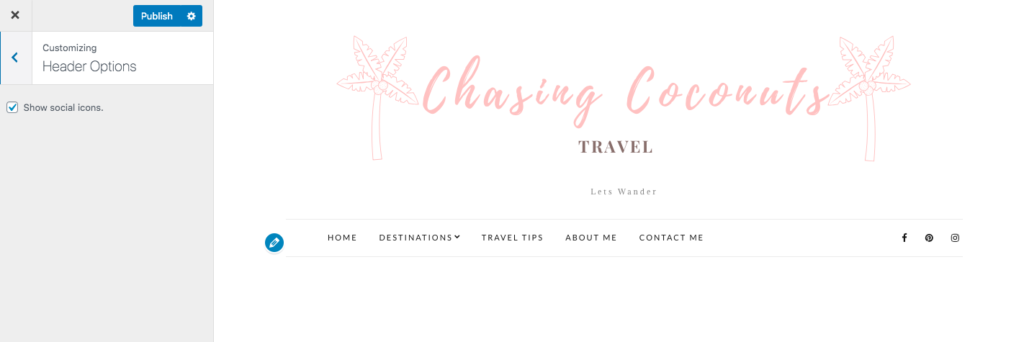
I like to have my Social Icons displayed on both the header and footer bar. To do this navigate back to the main menu and click on header options and tick the box to show social icons. Go back to the main menu and do the same thing in footer options.
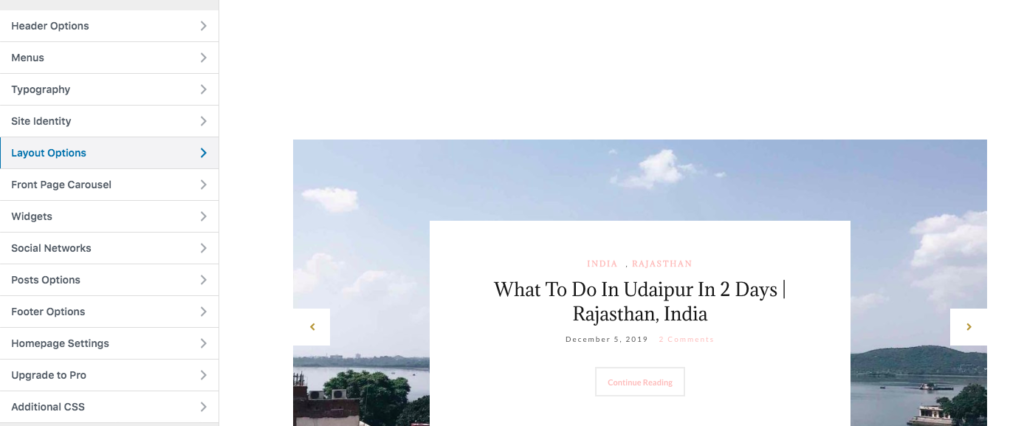
Customize Your Blog’s Layout & Font
You can set up your blog’s homepage to be either a static page or your latest posts. Since this is a blog I have opted to display my latest posts. You can adjust this is the Customize view by clicking on homepage settings.
This Theme also gives you the option to display a front-page carousel which I have enabled to display my latest posts because I think it looks nice. you can enable and customise the content it displays or you can disable it if you don’t like it. This can be done from the Front Page Carousel menu option.
Under the Layout Options menu, you can adjust the layout. I have opted for the classic one-side bar. You can adjust pagination and how long your posts excerpts are here as well.
You can adjust the font on your blog’s headings and paragraphs by clicking on Typography. There are different options for fonts and sizes for each of the headings and the text.
Once you are happy with all of the layout adjustments remember to click publish before exiting from the customization view.
Create A Primary Menu
This is the menu that displays on your header and allows users to easily navigate through the pages and categories on your blog.
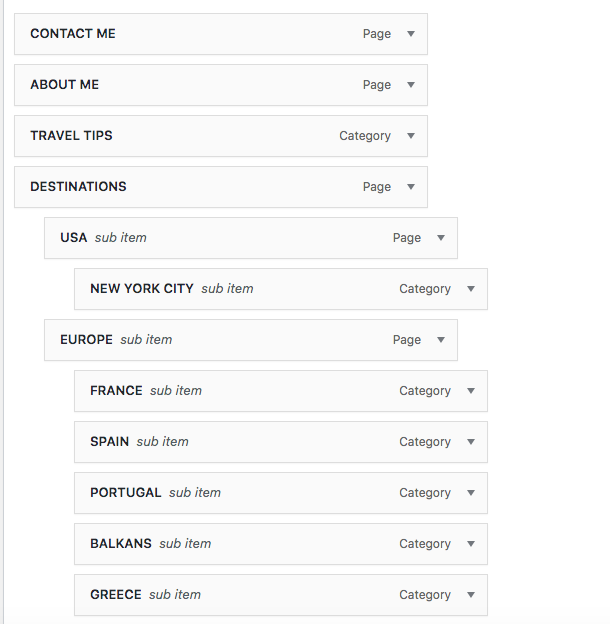
For my travel blog, I set it up with a Destinations drop-down menu, travel tips, about me and contact me. I also have a home tab which will always just navigate back to my homepage of latest posts.
Create Pages & Categories For Your Primary Menu
For each item that you want to display on your menu, you need to create a page or a category for it. I created a page for Destinations, About Me and Contact Me. The other items in the menu are categories so when you navigate to a category on the menu it will take you to a list of all the in that category.
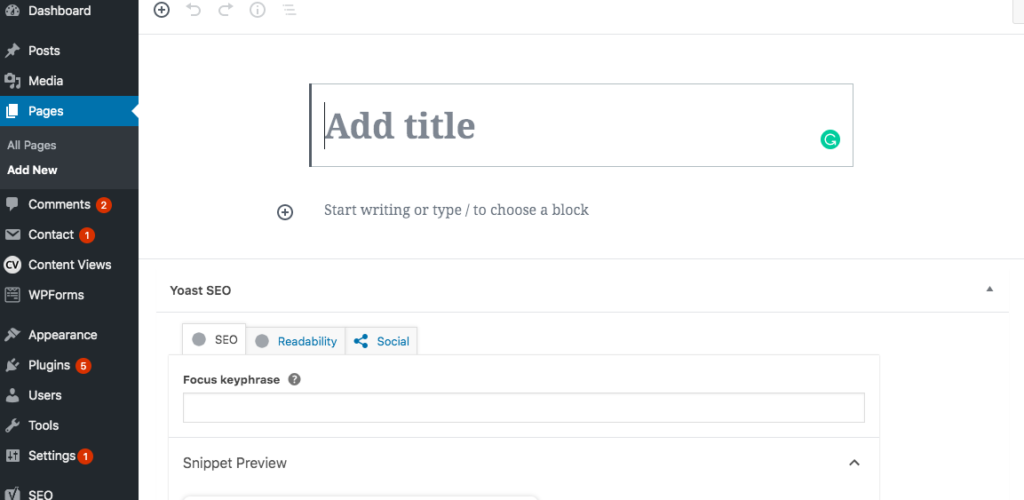
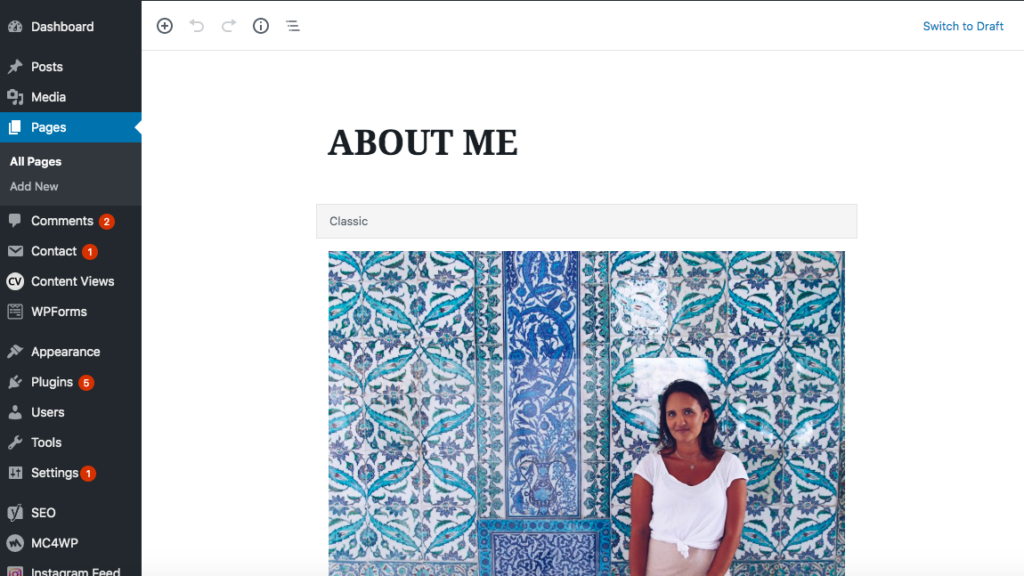
First to create a page go to your main Dashboard and hover over pages on the left-hand side and click on Add New and type in the page title. You can also add in some content for your About Me and Contact Me pages to publish on your site.
For my Destination page, I created Images in Canva for my main destinations and then embedded a link on the images to the Page or Category corresponding to that destination. You can add a link to an image by editing the block the image is in.
Hit publish on your pages!
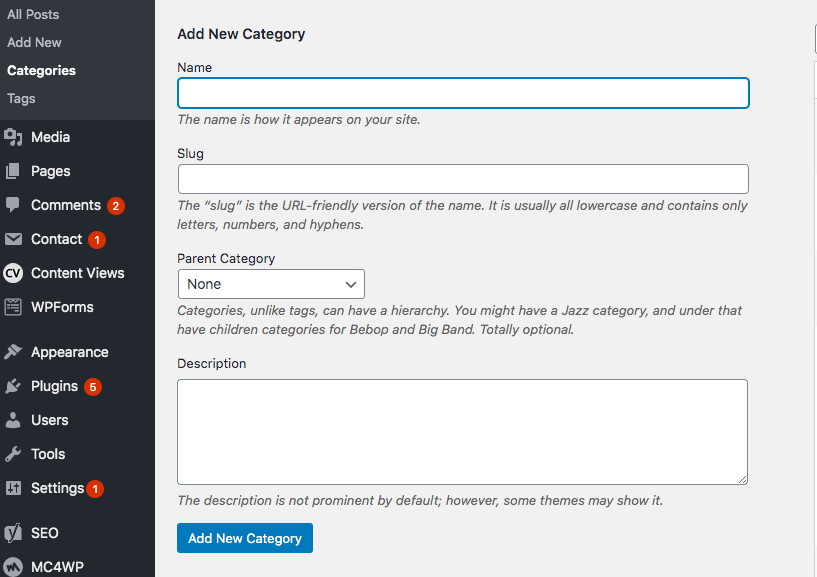
Next, add categories. These can be used on your posts to organise your content into categories. They can also be added to the main menu. On the main dashboard hover over Posts and click on Categories.
Type in the name of the Category. This could be a Country, City, State, tips or anything that you might be writing content about. Add in how you want the slug to look and then simply add the category. Now when you write a post these categories will come up on your right sidebar to click on for that post.
Now it is time to create your menu!
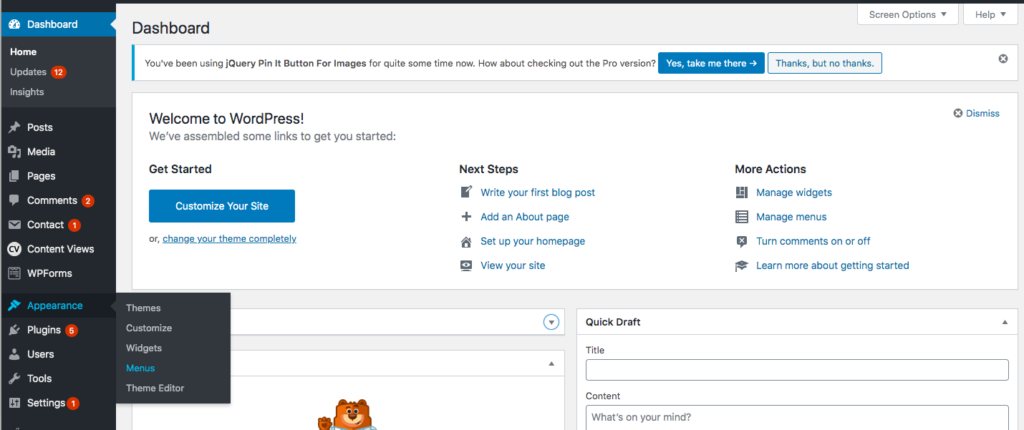
Go to the main dashboard and hover over appearance and click on Menus which will bring you to your menu management page where you can add menus and change the structure and settings.
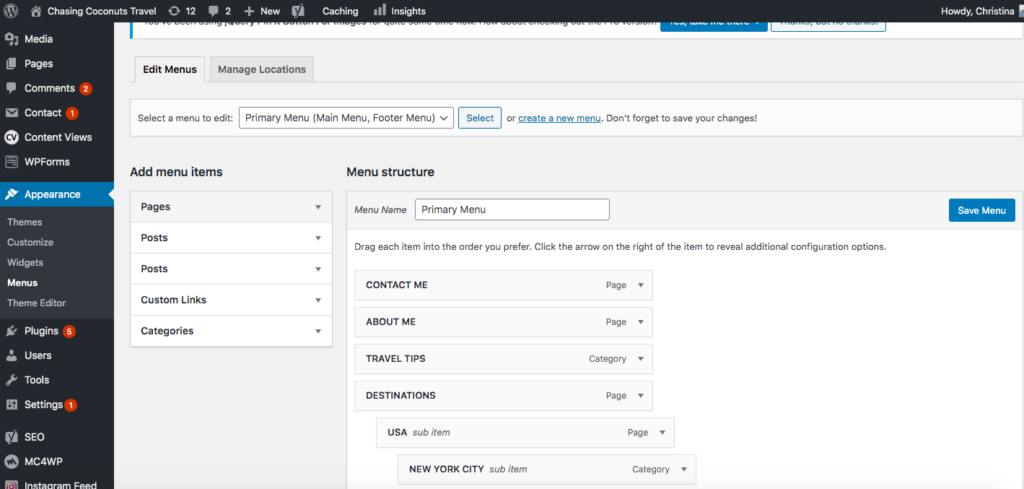
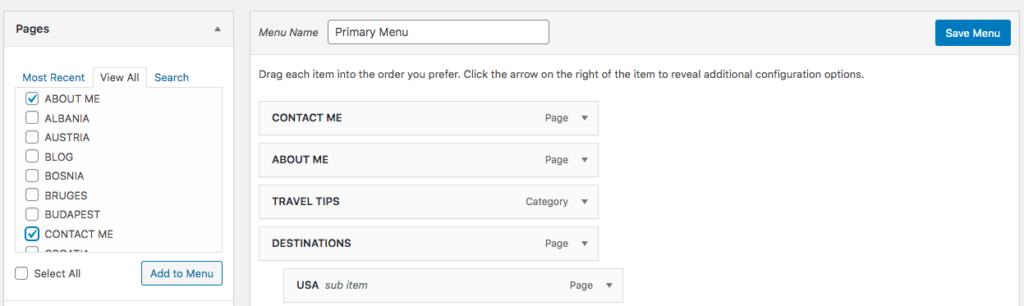
Firstly type in the menu name- I called mine ‘Primary Menu’ and then click create menu. Next start building menu. On the left-hand side where it says pages click on the drop-down arrow and select all the pages you just created and select add to the menu.
Next, do the same for the Categories section. Add all the categories that you want to include on your main menu.
Once that is done you can drag and drop the different pages and categories in the correct order, with the menu item closest to the top being the item furthest to the right on the menu. You can drag sub-categories under the main menu items to create drop-down menus. Click the boxes at the bottom that say display location on main menu and footer menu.
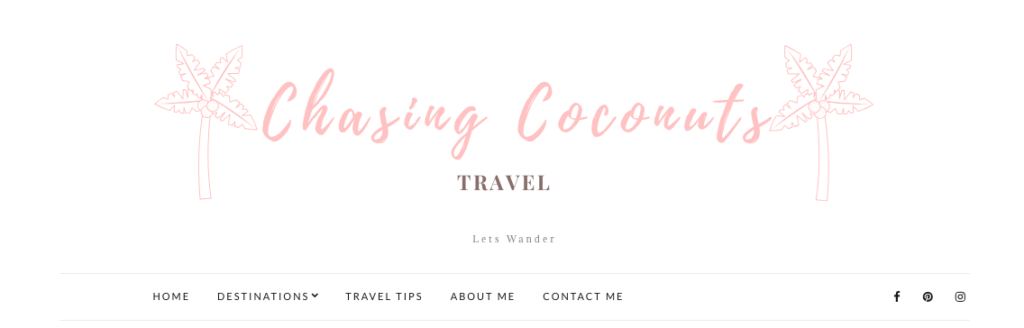
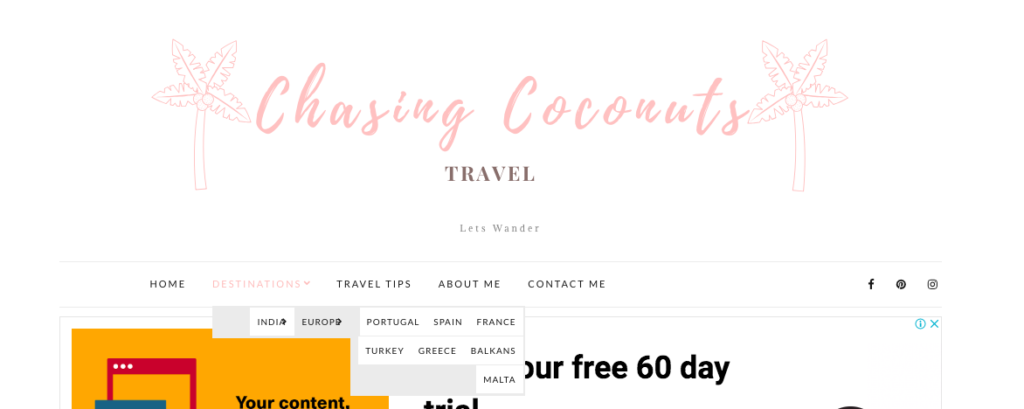
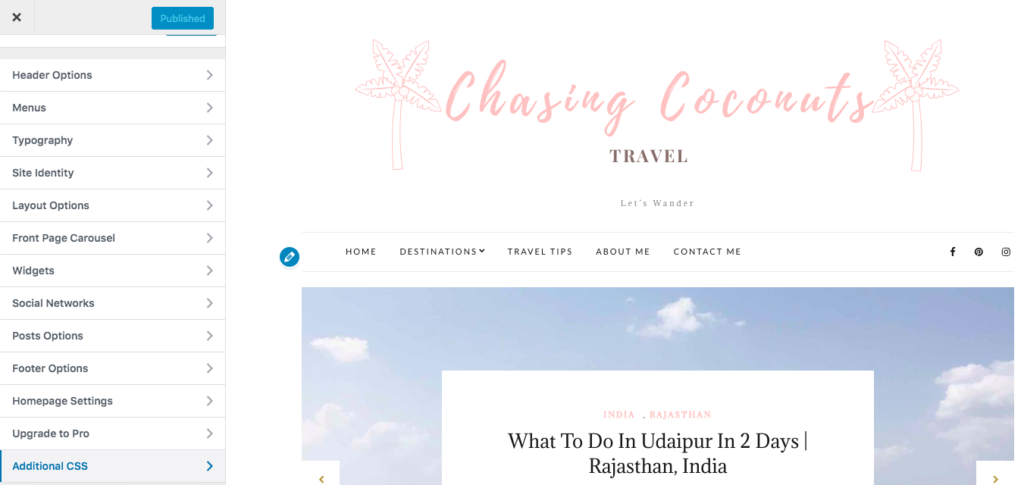
Below you can see what my menu looks like on the backend and on the front end.
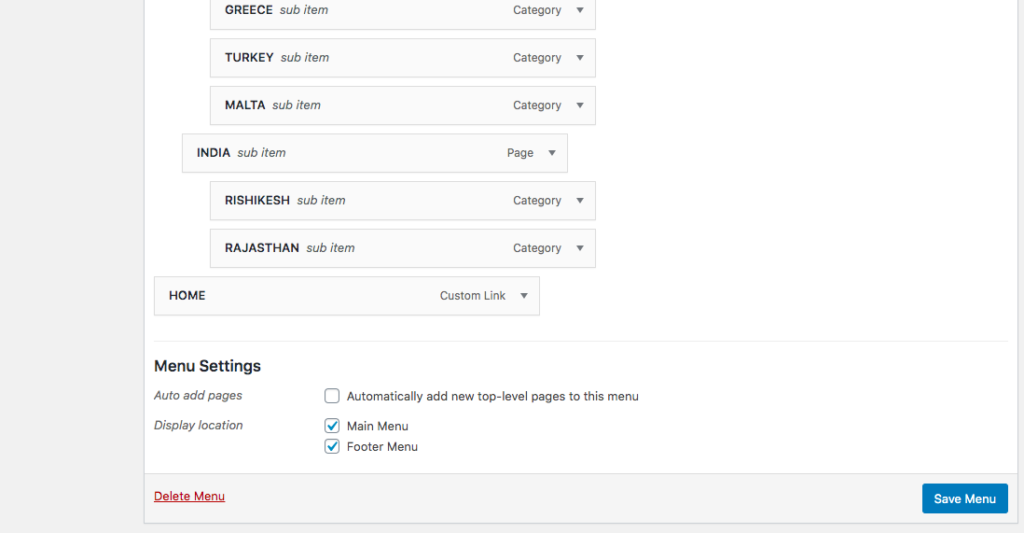
Once that is all set up click Save Menu button.
Configure Your Side Bar
This theme has a 2 column design with the main content being to the left and a side-bar to the right where you can add various widgets and links. On my side-bar I have included the following widgets:
- About Me
- Social Links
- Email Sign-up Form
- Search Bar
- Instagram Feed
To add in these Widgets you will need to have installed, activated and configured plugins for a Contact Form, Social Icons and an Instagram. I used Easy Forms by MailChimp, Simple Social Icons & Instagram WD Widget. In step 9 I will go over in more detail about setting up the MailChimp contact form.
Go to the Customize window and click on Widgets > Blog
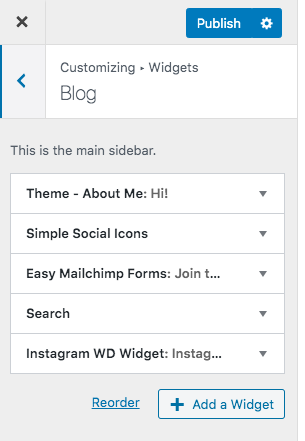
These are all of my active Widgets but in your view, you will see the default ones that come with the theme. You can remove all the widgets that you don’t want.
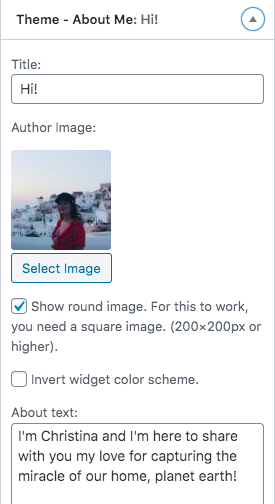
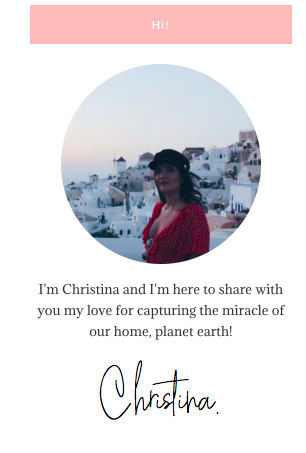
To add a widget click on the Add a widget button and a menu will appear to the right of all available widgets. Start off by selecting the Theme-About Me Widget and then configure the widget by giving it a title, adding a picture of yourself and writing a bio. You can also add a signature. I created an image using a script font of my name on Canva and uploaded it here.
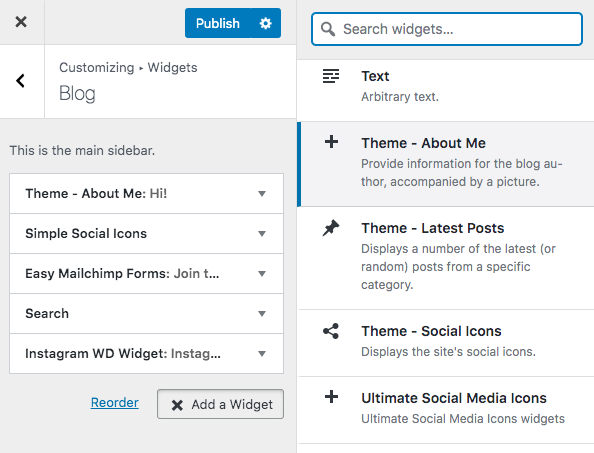
Add the remaining Widgets which you should be able to find by scrolling down the menu. For the Simple Social Icons, you can configure the widget here by inserting your links and choosing the button style and colours.
For the WD Instagram Widget, you will need to first link your Instagram account by logging into Instagram through the plug-in which can be done by clicking on the Instagram Feed on the main left menu on your dashboard. You can also edit the style of your feed here once it is linked by clicking on the feeds section.
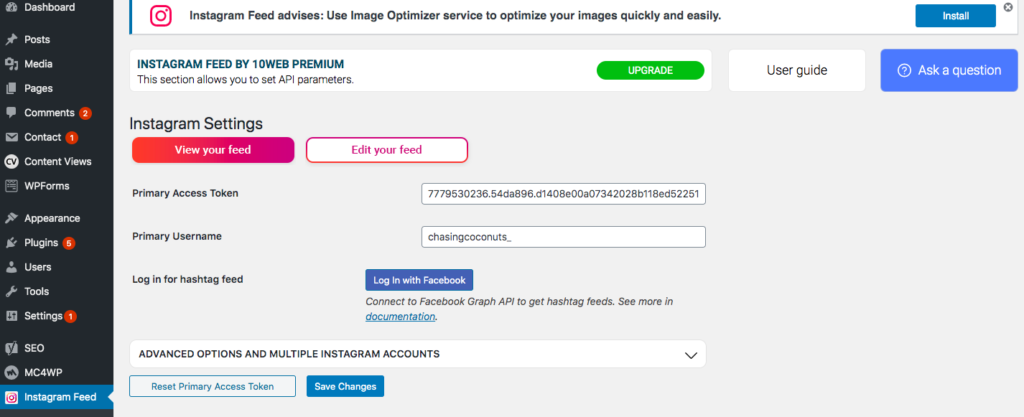
Then go back to the Customize tab and add the Instagram WD Widget and adjust how many images you want to be displayed and the number of columns.
Once you have all your widgets set up you can adjust the order by dragging and dropping. Note that you can also edit widgets from the main dashboard view by hovering over Appearance and clicking on Widgets.

8. Customise Your Blog’s Look Using CSS
One of the great things about WordPress is that it enables you to add your own code into a template so that you can further customise the look and feel of your travel blog to make it unique to you!
We are going to add in some code into the CSS to make the menu centred and to all change the colour scheme of the blog.
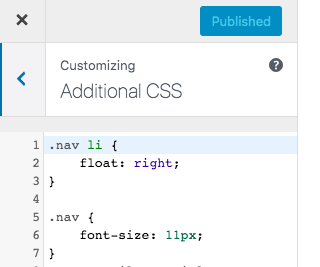
Centre the Navigation Menu
Copy the following code:
.nav li {
float: right;
}
.nav {
font-size: 11px;
}
Now navigate to the Customize window and click on Additional CSS and paste that code into the box starting at line 1 after removing the text that is already in there. You will see the menu move to the centre.
There is code in there for the font size which is set at 11. You can change the number in the CSS code to make the font of your menu larger or smaller.
To Change The Theme Colour
By copying and pasting the code below into the additional CSS and changing all the coding that points to the colour you can change the whole colour theme of your blog. Throughout the code, you can see the combination #f4c2c2. This is the colour code and this is the ONLY piece of code you need to change in the CSS field.
.btn, .comment-reply-link, input[type=”button”], input[type=”submit”], input[type=”reset”], button {
background: #f4c2c2;
}
a:hover, a:focus {
color: #f4c2c2;
}
.navigation > li > a:hover, .navigation > li.sfHover > a, .navigation > li.sfHover > a:active {
color: #f4c2c2;
}
.widget-title {
background: #f4c2c2;
}
.entry-meta a {
color: #f4c2c2;
}
.read-more {
color: #f4c2c2;
}
.read-more:hover {
border-color: #f4c2c2;
color: #161616;
}
.entry-title a:hover {
color: #f4c2c2;
}
I wanted my blog to have a peachy pink theme so I went and found the code for my perfect shade. I used Canva to do this. If you open a new design and for example add some text and find the exact colour you want by navigating to the colour palette and clicking the + button you can find the exact shade and the code which will be at the bottom starting with #.
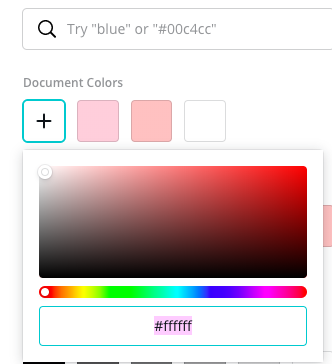
Paste the code into the Additional CSS and then copy your selected colour code and paste it over the colour that is already in the code. You will see all the colours on the theme start to change including all the buttons, headings and hover colours.
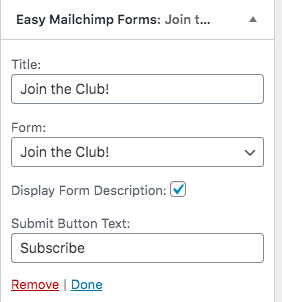
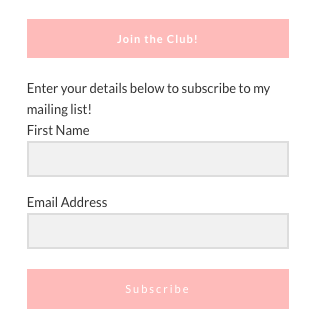
9. How To Install Opt-In Forms And Build An Email List
Sign up to MailChimp, which is free for up to 2000 subscribers so it is good for when you start a travel blog. They also let you create free opt-in forms and pop-up windows to help you grow your email list.
Once you are signed up you can create an audience or list for where people will be added when they subscribe through your form. Here you can input details about what email your subscribers will reply to and who the emails will be from.
Now you can configure your popup form using the Easy Forms Plugin. Click on the Easy Forms button on the left-hand side of the main dashboard. Link your MailChimp account and List and start building your form. It is really simple. You can choose which fields you want to display and what text you want to include.

Once that is all set up you can go back to your Widgets and add the Easy Forms Widget to your blog sidebar. Which should already be set-up from your configuration in the plugin!
Once you have some content going and people have started signing up to your list you can go back into MailChimp and learn how to create email campaigns and newsletters to send out to your subscribers.
Now your travel blog is all ready to go it’s time to get writing!
10. Start Creating Travel Content That Is SEO Optimized
Finally, we are at the best part, creating blog posts! Creating a lot of content for when you start a travel blog is really important for you to be discoverable on Google. It can take a really long time to build up when you first start a travel blog. The more posts you make that are of a reasonable length the more searchable you will be on Google.
I suggest brainstorming a bunch of article titles that you want to write. Then go through and add some headings to create an outline for your post and then fill in paragraphs below the headings. All of a sudden you will have a well structured and easy to read post!
When writing blog posts think about a problem that you could solve for your readers like ‘How to get a visa for India’ as well as list posts like ’10 Things To Do In Rishikesh’. These seem to do really well. If you can write about something that is a niche it will be great for SEO. There will be less competition from other more established bloggers so get specific!
Remember to tick the relevant category or categories and add tags to your post. You can do this on the document editor on the right sidebar.
Make sure you set a featured image to appear at the top of your page and in the preview on your home page. If you don’t have your own photos to use you can download free stock photos from Pixabay, Pexels & Unsplash.
One SEO tip is to include your key phrase or keywords in the Alt Text of your photo which you can add when it gets uploaded or in the document block on the right side.
SEO Tools To Grow Your Travel Blog
Here are some amazing (and free!) SEO tools for you to use to help you get some traffic to your site after you start your travel blog.
Yoast SEO
This plugin is absolutely amazing, there are so many things it does! It will index your website and make the titles searchable. You can also use it to claim ownership of your site through other platforms like Pinterest.
But the main thing I use it for is the SEO & Readability functions on all my posts. If you go to the bottom of the post you will see Yoast. Here you can input a focus keyphrase for your post, add a meta description (which shows up in Google), as well as edit the post title and URL. Yoast will then analyse your post for SEO based on your keyphrase and a number of other things. You can see what you need to improve and where and when the dot goes green you know your SEO is on point!
It also has another light for readability which will help you make sure that your post reads well and people will love it! I also recommend installing the Grammarly onto your browser as this is a powerful spelling and grammar checking tool
Ubersuggest
Ubersuggest is a free and powerful SEO tool created by SEO expert Neil Patel. You can use this tool to find out the traffic and best performing keywords on your site and your competitors’ site. This can help you to find keywords that are really popular so you can start to implement them more into your posts.
It can also indicate which types of posts are highly competitive in Google and therefore less likely to land you at the top of the results. Ubersuggest allows you to get insight into the strategies that are working for others in your market so you can adopt them, improve them, and gain an edge.
SEMRush
SEMRush is an amazing tool with some free features and a free trial as well. It will give your website an SEO audit and identify any issues with your content and URLs which you can easily go and fix. It will also give you an overview of your traffic and analytics.
There are tools that do your keyword research, tracks the keyword strategy used by your competition, runs an SEO audit of your blog, looks for backlinking opportunities and lots more.
Google Search Console
Google Search Console helps you to monitor, maintain, and troubleshoot your site’s presence in Google Search results. It helps you understand and improve how Google sees your site. It will show you where there are any issues on your posts or pages affecting SEO as well as which pages and keywords are performing well so you can focus on including more of those in your site.
Google Analytics
Google Analytics is a powerful way to monitor the traffic on your site and where it is coming from and gives you information about who your audience is. This can help you track how well your blog is doing and tailor your content better for your audience.
11. Get Social With Pinterest And Instagram!
Pinterest and Instagram are two important social media platforms when you start a travel blog. They can help you grow your travel blog brand online. Plus it’s fun!!
When you start a travel blog you should also start a travel Instagram account. Instagram truly is the territory for travel bloggers! Yes, there are a ton of us on there but there are also millions of people who absolutely love travel content! This is because it is visually appealing and totally inspirational! Who doesn’t want to daydream about the amazing places we get to go as travellers!
You also don’t need to be an incredible photographer with equipment and editing skills. Thanks to the explosion of presets being created by the best Instagram influencers as well as amazing camera technology on our phones, plus a never-ending supply of inspiration online, it’s never been easier to craft an amazing Instagram feed.
You can grow your Instagram account by doing the following things:
- Post consistently good content that has a cohesive look. Use a scheduling tool like Later or Hootsuite which both have free plans.
- Use hashtags, research the best ones based for travel bloggers and ones based on location
- Join engagement pods to boost your posts so they become more visible
- Write meaningful captions that get your followers to engage or answer a question
- Use geotags and tag other relevant accounts who may then feature your content
- Engage with your followers and people you are following- like and comment and start to build little Instagram networks.
- Participate in giveaways if given the opportunity this is one of the best ways to grow your account fast
- Use Instagram stories to show the ‘real’ you and to interact on a more personal level with your followers
Having a strong following on Instagram will drive people to your blog and your posts which you can share on your feed and your stories. It will also be a way for you to showcase visually where you have been which will really inspire people to travel which is why we do this right!?
Pinterest is actually more of a search engine as opposed to a form of social media. You can think of it as a visual search engine. It is a great way to grow when you first start a travel blog. There are millions of people on Pinterest every day searching for travel inspiration and information on specific locations. If your pins are showing up high on their feed you will get a lot of traffic to your site from Pinterest.
First of all, sign up for a business account so you have access to analytics and can claim your website. Then create your profile and your boards with descriptions.
How To Use Pinterest
The best way to approach Pinterest is to create 3-4 pins per blog post in Canva that are vertical and have an image and some writing about what the post is about. You can create a template and use it for each post.
Next for each post create a description that is full of keywords related to your post. Doing SEO on Pinterest descriptions will help you show up in results. Now get pinning, the more you pin the better and you can create many pins per post. There are scheduling tools for Pinterest with the best being Tailwind which you have to pay to get the full functionality. Otherwise, you can schedule pins within Pinterest and on Hootsuite as well.
Grow With The Pinterest Community
You can also extend the reach of your pins by joining and posting on Group Boards and Engagement Groups on Facebook.
There is a ton of information out there on how to create a killer Pinterest profile and increase traffic, the best place to find these resources is on Pinterest itself so get using! You can have a look at my Pinterest account to see how I have mine set up.
There are also Pinterest groups on Facebook for Travel Bloggers and other groups for travel bloggers. These are amazing communities filled with very knowledgeable and skilled people who are more than willing to share information. Think about joining some of these groups when you start a travel blog to learn the ropes and stay up to date with what’s going on in the travel blogger world.
This post contains a affiliate links for Bluehost & Canva Pro. If you decide to purchase through these links, I receive a percentage of the sale at no additional cost to you.
And That’s A Wrap On How To Start A Travel Blog!
If you made it all the way to the end WOW I’m amazed!! This is the longest post I’ve ever done. I really wanted to cover everything and give you all the specific information in one place that you need to start a travel blog in 2020!
Let me know in the comments if you have found this useful and started a travel blog. If you have any questions leave a comment or send me a DM on Instagram.
Be sure to have a squiz around my website to see everything that I’ve talked about in this post in action.
Peace out!